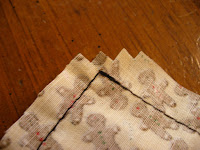
Begin your bag by cutting your fabric to the size you want. I didn't measure one thing in this project because I like to live dangerously like that, but this one is about 10 x 7 inches. You can also cut one large panel (in this case, 20 x 7 inches) and fold it in half with the right-sides together. The fold will be the bottom of your finished bag. Either method is fine.

I cut the top of my bag with pinking shears (the kind that give it a zig-zag edge) for decorative effect. This will prevent the bag from unravelling as well.
To add the tie, cut a piece of ribbon about 15 inches in length making sure to cut the ends at an angle so the ribbon won't unravel. Fold the ribbon in half and lay it across the printed side of one panel of your bag about 1/4 of the way from the top.

Lay the other panel of fabric on top of that piece matching up the edges as best as you can. You can pin the edges together, but you already know I'm dangerous, so I just pinned where the folded end of the ribbon is.

Sew in a straight line down the edge with the ribbon fold in it first, removing pins just before they go under the presser foot. This is how the folded end of the ribbon should look after being sewn in:
If you are sewing two panels and you come to the corner, sink the needle into the fabric, lift the presser foot and turn the fabric so you'll be sewing along the bottom edge. Repeat that step at the next turn. For the folded method, just sew a straight line down each side of the bag. Make sure you move the loose ends of the ribbon tie out of the last edge before you sew down that side.

When you are finished, I find it nice to trim the corners to remove a bit of the bulk before you turn the bag right-side out. If you folded your fabric, you won't need to do this.
Now, just turn your bag right-side out, fill and tie! Remember that you can make your bags any size. I am making several in different sizes for Christmas and birthdays. The possibilities are endless!


The new blog is great guys! the layout is wonderful and the idea to move everything over here is excellent.
ReplyDeleteI found your post while searching for fabric gift bags. This is a great idea, showing people how to make the bags. I make and sell them, however, I think your idea of sharing the how-to technique is a good one - mind if I share your post with my visitors?
ReplyDeleteSandi,
ReplyDeletePlease do share. We love link love! :)
You have some cute bags over there. I love your lace table cloths too! Lovely!
Love it! Good job! Isn't it fun that three of us were thinking of similar projects this week :-)
ReplyDelete(Seen in Make It From Scratch Carnival)
Cute bag! Plus it's so wonderful and frugal to make it yourself rather than buying gift bags. Thanks for sharing the handy tutorial too.
ReplyDeleteYou have SUCH a fabulous blog!!! I'll be linking to this project and adding you so I don't miss a thing!
ReplyDeleteGreat work!!!
ReplyDeletemy roommate bought a panda bag!
She is just THRILLED with it and can’t put it down.
hkpanda.freetzi.com