Thursday, December 3, 2009

Making Ornaments with the Kids

Yesterday, was our annual trek for the perfect Christmas tree. Every year we head to the nearest tree farm, and hike through their fields until the perfect tree has been located. It is always a fun family day. Yesterday was no exception, despite the cool wet weather, but the best part comes after we get the tree home.

With our oldest child's first Christmas a tradition began. A new ornament was added to the tree for that child each year. Of course, many years there are several ornaments because other family members give ornaments as gifts, and ornaments are made with various groups we participate in. Now, three more kids and eleven years later, our tree is full of ornaments for the kids. Bringing out those ornaments each year brings lots of memories, discussions, and warm hearts.

Many of the ornaments are purchased, and they are beautiful, but my favorites are the hand made ones. They are not always the most beautiful ornaments on the tree, but they do have the most beautiful memories associated with them. These usually are the ornaments the kids remember best, and the ones that I cherish most.

Here are a few of the homemade ornaments on our tree this year. Some are old. Some are new. Some we made as a family, and some the kids made elsewhere. All of them hold a special place in our hearts.

Easy Photo Ornaments.
These are so incredibly simple. Fold a piece of construction paper or card stock in half. Cut out a ball ornament, keeping the fold in tact at the little rectangle on top or the ornament. Decorate the outside front with glitter, coloring or other decorations. Cut a photo of the child in the same shape as the ornament and glue it inside. Use a ribbon to hang the ornament.


Recycled Christmas Card Ornament
This is a wonderful way to use last year's Christmas cards, and create and easy ornament with the kids. Simply cut out the main image from a Christmas card. Glue ribbon or other embellishments around the edges. Punch a hole in the top corner, and use ribbon to create a hanger for the ornament.


Painted Glass Bulbs
Buy clear or colored glass bulbs. Paint with glass paint, or use glue and glitter to decorate the bulbs. Confetti, glitter or other items can also be put into the inside of the bulb for a decorative effect.

Dough Ornaments
See Heather's instructions for making the dough in 5 Simple Christmas Crafts for Kids. My favorite dough ornaments were made long ago when my eleven year old's hand fit into that mold. *sigh* We made a foot print ornament for his then baby sister.


Beaded Candy Canes
Simply take a piece of pipe cleaner. Thread red and white beads onto it and fold the pipe cleaner around each end. Bend into a cane shape.


Pottery Ornaments
Though a little more expensive, it is a fun family time to take the kids to a make and take pottery place. Our local one is called the Pottery Place. Simply go and pick out a ready made pottery ornament. Then paint it how you like. They fire it, and you can pick up when it is done.


Our tree is full of children's ornaments. Some are purchased, and some are homemade. Every year a new one (or two or three) is added for each child. Every year we label the new ornaments with the child's initials, and the year. Pulling them out each year to decorate the tree is one of my favorite family times. They are all special, but the homemade ones are the best!

Tuesday, December 1, 2009

Carnival #144

Welcome to the December 1, 2009 edition of Make it from Scratch! December?! What how can that be? Well, on to the carnival.

cooking

Fabulously Broke presents Recipe: McGuyvering a Banana Cake posted at Fabulously Broke ....in the City, saying, "Banana cake made with a few substitutions!"

mb presents Sake Marinade Salmon posted at Taberu West Japanese Recipes, saying, "Learn to cook the most delicious salmon."

Our Red House presents Meringues with Strawberries and Cream posted at Our Red House.

Liss presents Sunday Baking Project: Olive, rosemary and gorgonzola loaves posted at Frills in the Hills, saying, "Whatever the season, this is a great bread hot or cold, to eat by yourself or to entertain with. You won't make it just the once."

Kris presents Veggie Might: Grandma’s Apple Pie posted at Cheap Healthy Good.

Annette Berlin presents 18 Grilled Cheese Sandwich Variations posted at Craft Stew, saying, "Tired of the same old grilled cheese sandwich? No problem. Here are 18 yummy variations to perk up your appetite. Enjoy each variation on it’s own, or try combining a few for extra taste."

NerdMom presents Peaches and Cream French Toast posted at Nerd Family Food.

knitting. crafts. other

Cyndi presents Some simple CopprClay pendants to make posted at Beading Arts.

Gary Mullen presents Creative uses for Ostrich Feathers posted at Culture Blog, saying, "Ostrich feathers and their use in craft work."

Free needlepoint patterns for domestic goddesses posted at Miss Thrifty.

Make a knitted bobble hat like Cheryl Cole's posted at Make it and Mend it.


Jessica Garrett presents Holiday Wreath Making! posted at Crafty Tax Attorney.

Darcy presents Smart-Bottom Enterprises: Hand Print Christmas Tree posted at Smart-Bottom Enterprises.

Rod presents Pedal-powered ball machine posted at Tennis Ball Machines, saying, "OK, so this is not something most people would be able to make themselves, but just goes to show you don't have to spend big money to benefit from this kind of technology."

Wren Caulfield presents The fence that makes good neighbors needs a gate to make good friends posted at True Adventures in Money Hacking.

Beth Terry presents Thanksgiving, Buy Nothing Day, & My Travel Mug posted at Fake Plastic Fish, saying, "My attempts to create my own travel mug & cozy. Sometimes we learn from failures too, right?"

pbmedia presents How to Fix a Leaky Delta Faucet posted at jammer(six).

That concludes this edition. Submit your blog article to the next edition of Make it from Scratch using our carnival submission form. Past posts and future hosts can be found on our
blog carnival index page
. Next week the carnival will be at Gotta Little Space.

Wednesday, November 25, 2009

Happy Thanksgiving


We are taking the weekend off here at Make it from Scratch. Hope you have a wonderful weekend with family and friends, and of course lots of delicious made from scratch food. See you here next week for more frugal and creative ideas.


Photo credit: Gracie

Tuesday, November 24, 2009

Carnival #143

The Thanksgiving countdown has begun. How are your preparations coming? Quite honestly I am rather behind, and will be sprinting to get everything done by Thursday! Yesterday, I had a small panic when my oven stopped working, but it is functioning again, thankfully!

I'm taking a few minutes this morning to check out the MIFS carnival hosted this week at Frills in the Hills. Here are a few favorites:


Cranberry Chutney

I just adore cranberries this time of the year. I love homemade cranberry sauce, and I love them in breads. Chutney, however, is one way I've never tried a cranberry. This looks delicious.

Wreath Ornaments Made with Pickling Spices

What an interesting, and I imagine fragrant idea.

Homemade Tortillas
This is a reminder to myself to make these again. We've made them exactly once. We loved them, but haven't made them again. I really should make a large batch to keep them on hand.

Thanks for joining us for the carnival this week. The Festival of Frugality is also up and can be found at the Financial Blogger. Hope you Thanksgiving preparations come along smoothly!

Friday, November 20, 2009

Tinkerbell costume - great little girl gift!

Kellie is a mom, wife, tree-hugger and crafter. She blogs regularly at Greenhab and the Green Phone Booth.


Now that Macy is in Kindergarten we are starting to get a lot of birthday party invitations. Little girl birthday parties are so much fun, aren't they? But birthday parties in general can get out of hand when you're spending $20 each and going to one every few weeks.

The last party Macy was invited to had a Tinkerbell theme and I just *happened* to see some very Tinkerbellesque tulle type fabric at JoAnn's the week before the party. Did I mention it was on sale from $9.95 down to $3.99 per yard, plus the lady gave me a 20% off coupon? Love love LOVE a bargain!

And I love a quick and easy project! Here's what I did:


1. Unfold the fabric, then refold it lengthwise. I made the top layer about 2 inches shorter than the bottom layer for a frilly-fairy-leaf effect. Iron with a barely warm iron if needed.

2. Fold the top down about an inch and pin, sew a hem across to make casing for your elastic waste.

3. Using a safety pin, thread your elastic through the waste band you just made.


4. Lay flat and cut petal leaves...unless you're making something other than a Tinkerbell skirt of course. You could sew some ribbon on like binding in a contrasting color!


5. Fold with right sides together, pin down the side, sew all the way down. This will change it from one big long piece of fabric into a skirt. Turn it right side out and you are halfway to Tinkerbell.


For the crown, you're going to basically follow the directions I gave for last week's headband, except you wear it like a crown instead of a headband. For the crown part, I cut two pieces of felt, then ironed on an interfacing. You can decorate this any way you'd like. I used some of the scrap pieces of the skirt in the crown. You'll sew the front and back together, leaving each end open to insert the elastic that holds in on your head.

Now you have the cutest little outfit ever for a little girly girl. My daughter has already requested on for Christmas!

Thursday, November 19, 2009

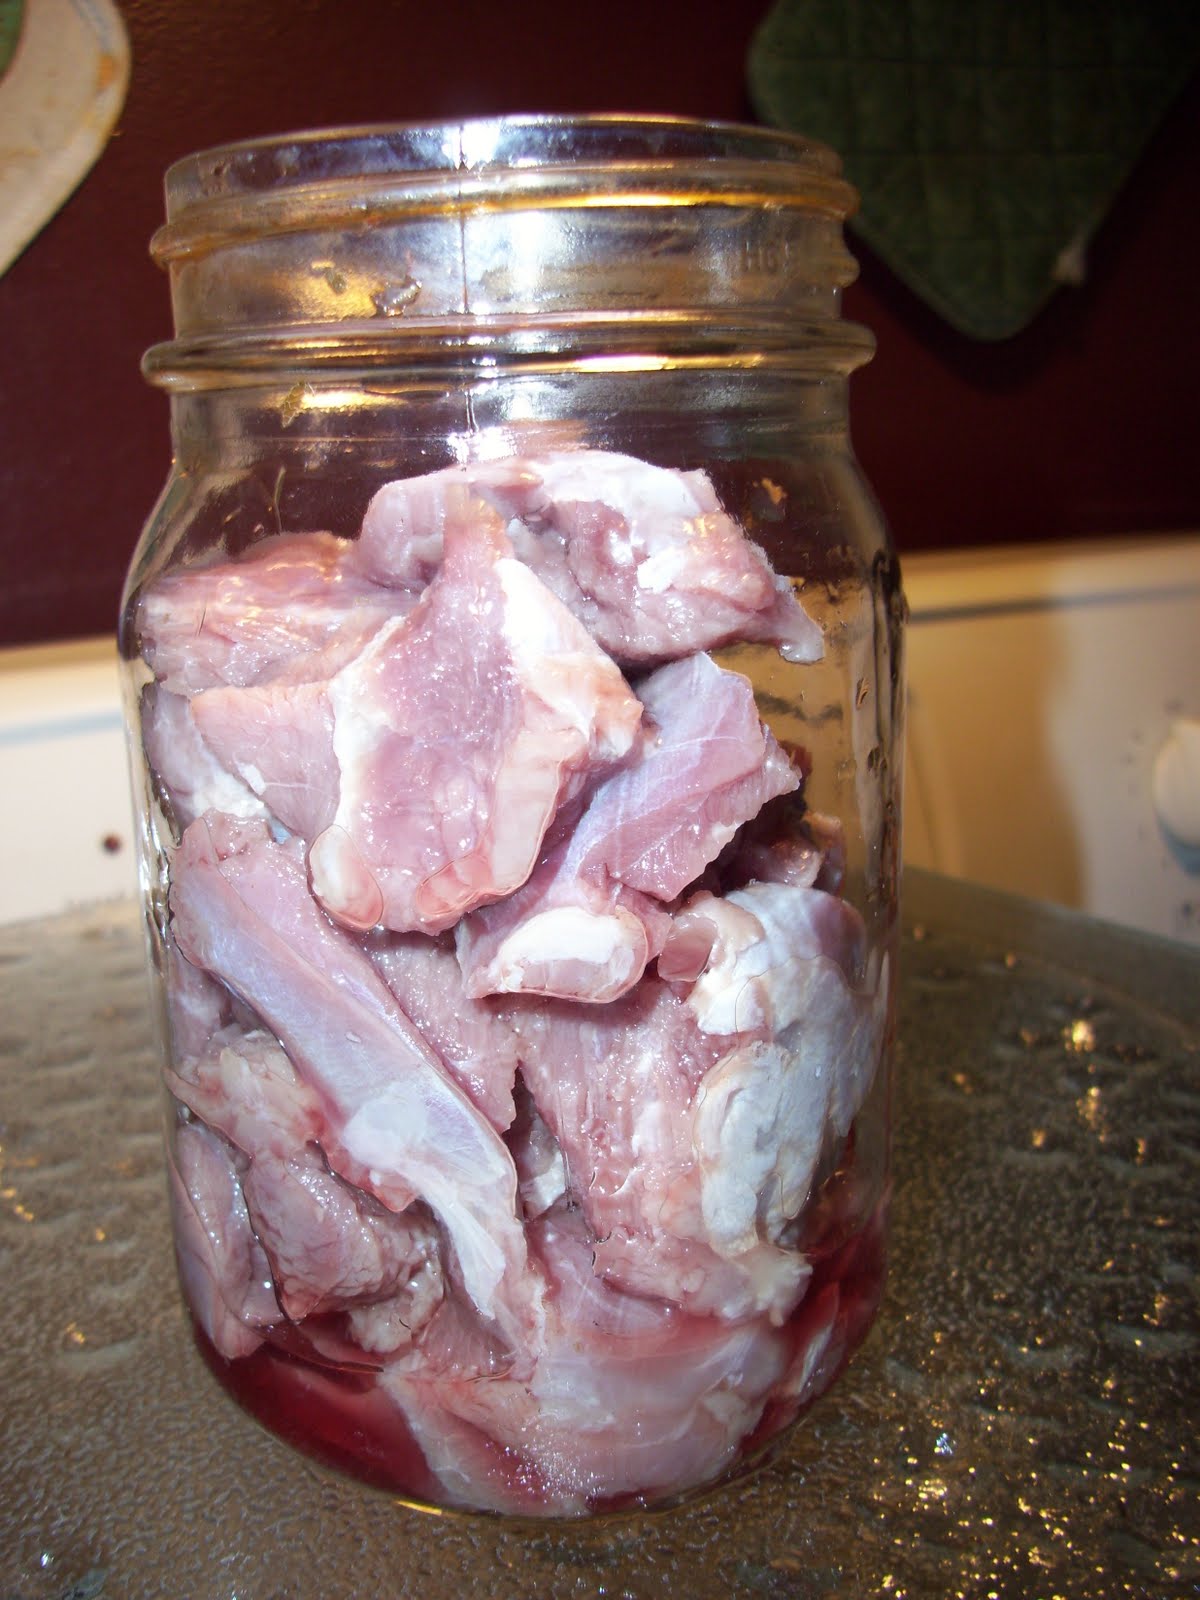
Canning and Using Stew Meat


I know this jar of meat doesn't look all that appealing, but I promise you that inside this jar is the tastiest quick meal starter ever.

Let's face it. Even those of us who thoroughly enjoy cooking and are committed to making food from scratch for our families, need a few quick and easy meals every now and then. The way I see it, we have two choices. We can buy heavily processed convenience foods filled with who knows what, or we can create some convenience foods of our own. I'd rather make my own. My favorite "convenience" food is canned stew meat.

Canning meat is a little time consuming, but the process is easy and the time involved is mostly passive while the pressure cooker is running.

First you need meat. Canning is perfect for the tougher cuts of meat. I can the leg meat and other small pieces from venison, but this process works for other red meats like beef, lamb or pork. This is a great way to preserve meat when you come across a fabulous sale.

Trim as much fat as possible, and cut the meat into cubes or chunks.

Pack raw meat into clean, hot jars. Loose pack and leave one inch head space. Put lids and rings on.

Process at 11 pounds pressure; 75 minutes for pints, and 90 minutes for quarts.

As the meat cooks under pressure it becomes extremely tender. Far more tender than I've ever been able to cook stew meat on the stove or in the oven. It also creates its own broth. The meat and broth together make a delicious quick start to a meal.

So, how do you use canned stewed meat? Here are some ideas:

Soups or Stews.
It is great for chili, vegetable soup, beef stew or any other stew or soup you like to make that calls for meat. Just add some water, tomato juice or more broth, vegetables, and spices.

Pot Pies
You may need to drain the meat a little for this use. Reserve the broth for later use. Mix in vegetables throw it in a crust and bake.

Beef and Noodles
Cook the noodles in broth. Add the stew meat and spices, and thicken with sour cream or corn starch.

Gravy
Sautee mushrooms and onions. Add some flour and then slowly add in the meat with the broth to create a gravy. Serve over mashed potatoes, toast or both, hot roast beef sandwich style.

Barbecue
Drain the meat. Add barbecue sauce. Heat and eat.

Beef and Rice
Cook rice in broth and water with spices and vegetables. Add in the meat.

I love having this ready cooked meat on hand to use when I've failed to plan or the plan has failed. It is cheaper, tastier, and likely more nutritious than any convenience food I could pick up at the store.

Tuesday, November 17, 2009

Carnival #142


This week the carnival is at Frugal Changes. Oh my goodness! There are so many wonderful entries this week. Here are a few that I really enjoyed.

Making Fabulous Paper Flowers with Tissue Paper
An easy and fun craft that could be done with the kids. I thing these will be great to do in the dead of winter to add a little spring to the house!

Soft Homemade Pretzels
I haven't had a big soft pretzel in a long time. These look so good!

T-shirt Scarves
An interesting way to repuprose a T-shirt. I like it!

Thanks for joining us for the carnival this week! And while you are checking out carnivals be sure to check The Festival of Frugality this week!

Header designed by Crystal. Thanks!