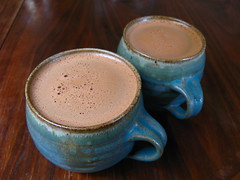
This week the carnival is hosted by Rina at Gotta Little Space. Thanks!
Here are some of my favorites this week:
Blue Hubbard Squash Casserole
This looks quite delicious. Blue Hubbard Squash just may go on my seed list for next year.
Homemade Enchilada Sauce
Red chilies....yum.....
Super Crunchy & Cheap Granola
How many granola recipes do I have to bookmark before I actually make the stuff?!
Hope you enjoy the carnival this week!
Tuesday, October 13, 2009
Carnival #137
Monday, October 12, 2009
4 Step Holey Rags
I don't know about you but when our socks start to wear out, the toes and/or heels are the first to go. Since I don't know the first thing about darning socks to repair the damaged area, I extend their life by cleaning with them. Something I think many of us do.
My problem starts when I toss them in the laundry. Unless they are unusually stained with something I've cleaned or laundered completely separate from the 'good' socks, they get cycled back into the sock basket - where I toss all our socks till we make time to match them up. While they hide in the sock basket, I'm looking all over the house for my 'cleaning' rags. FRUSTRATING!
My solution?
4 easy steps turns my lost damaged socks into dish or facial rags with a scrubbie side AND a soft side.Step 1: Cut straight across the toe area of the sock.*
Step 2: Start at the top of the sock and cut straight down.*
Step 3: You should have a flat almost rectangle shape of solid sock fabric with the ribbed side on one end. Fold in half with the ribbed texture on one side, wrong sides together and straight stitch around the edge with 1/4" seam or less. Be sure to leave an opening to pull the fabric through.
Step 4: Pull fabric through the opening and top stitch around the rag making sure to tuck under the unstitched area to form an even edge.
*Be sure to position your cuts to go through the hole or damaged area so your finished rag doesn't have a hole in the middle of it.
Crew or tube socks work best but with small modifications, you can use this concept on most socks. With the no show socks or ankle socks, simple cut as described above and use a running stitch or use a serger to prevent the edges from fraying.
Now you have a rag that won't get lost in the sock basket and a never ending supply of holey rags.
Jenn blogs about easy recipes, crafts, and a frugal lifestyle at the Frugal Front Porch.
Friday, October 9, 2009
~*Homemade Sandwich Wrap*~

We are all about packing healthy, waste-free lunches here in the Greenhab household. Well, I am at least. My 4 year old told me the other day "I think I'll leave my lunchbox here today mom. If a kid forgets lunch they give you a tray full of food and chocolate milk." He's too smart for his own good some times.
I do try to teach the kids about the importance of not only eating well, but packing lunches that don't require any packages or wrappers to be thrown away. For sandwiches, we have a Wrap-n-Mat that's really functional, but it's lined with plastic, which I'm not too keen on. Then we also have this green wrap, which is all plastic and a bit wonky anyway.
Since I'm packing ten lunches each week, I need a pinch hitter in case one of these is dirty, or left at school by accident. I incorporated ideas from several wrappers I've seen to come up with this extremely easy to make design.
I used two handkerchiefs for this, because my daughter liked the colors and they'd been sitting in my fabric stash forever.
You'll want to start with two circles of your fabric. You can make them the same, as I did, or use coordinating fabrics. I used a pot lid to measure out my 14 inch circles. Pin the circles, right sides together. Stitch around, leaving a 1/2 inch seam allowance and a hole for turning. Notch all around the circle so that it lays flat when you turn it right side out. Turn. Press flat. Top stitch all around.
Fold the sides in and press with an iron so that the wrap will naturally fold along those creases.
Add your velcro to the top and bottom. I used the kind that just sticks on, because that's what I had on hand. You can use any kind you'd like. Fill with a yummy sandwich and enjoy! This will also double as a place mat for your child as s/he eats lunch.
Thursday, October 8, 2009
Super Easy Firestarters
Fall is here. The cooler weather has not only increased our hot chocolate consumption, but it has made fires in the fireplace a regular event. Which means it is time to split fire wood, and time to make fire starters. I'll leaving the splitting to my husband, but yesterday I experimented with some homemade fire starters.
Fire starters are not a necessity. The fire can be started using newspaper, but that requires keeping kindling wood on hand. It is much easier to just have a slow burning fire starter on hand, and to start the fire with that and the logs.
Last year I made my fire starters with drier lint, wax, and egg cartons. Find the how to at Dryer Lint Fire Starters. These work wonderfully, but Suz of Family Makes Cents suggested an even easier way to make them. Yesterday I tried her suggestion.
How simple is this? Just put dryer lint into a toilet paper roll and burn. I cut my rolls in half to stuff. My first attempt didn't work so well. They did not burn. The second attempt I stuffed the roll loosely with dryer lint. It worked so much better, burning nice and slow to light the logs.
I think we will be making all our starters this way this year. In fact, I think this would be a great project to set the kids loose on some afternoon. They will be able to make up a bunch of these in no time at all!
Tuesday, October 6, 2009
Carnival #136
Edition #136 of the MIFS carnival is posted today at Lighter Side. The week's edition is packed full of delicious sounding recipes. Here are a few of my favorites:
Chocolate Dipped Apples
Apples dipped in chocolate and drizzled with caramel. I am drooling!
How to Grow Oyster Mushrooms
We occasionally find these mushrooms in the wild, and they are quite good. This video post shows an easy way to grow them at home.
Make Your Own Vanilla
This one of those tutorials that I see around blogs every so often, and every time I tell myself that I have to try this. Here I am saying it again.
Enjoy this week's carnival!
Monday, October 5, 2009
Semi Homemade Hand Soap
Here's a nifty little project you can do with hotel soaps or any bar soap bits you have lying around the house.
- Grate soap bits with a cheese grater into a glass dish or double boiler.
- Add boiling water and stir till all the soap is melted.
- Add optional scented oil.
- Allow to cool overnight in a glass dish.
- Stir well.
- Transfer to soap pump with a spoon and large funnel.
It's that simple to have your own hand soap, semi homemade!
Thursday, October 1, 2009
Homemade Hot Chocolate and Mix
The weather has suddenly changed to very cool and damp. The leaves have not yet turned, but it feels as if fall is here. The temperature drop has the kids clamoring for hot chocolate. So, this week we made the first hot chocolate of the season.
We make two versions of hot chocolate in this house. If we have an abundance of milk on hand we will make the real stuff on the stove top using the following recipe quadrupled:
Homemade Hot Cocoa
2 tsp cocoa
2 scant tsp sugar
1 cup boiling water
1 cup milk
1/2 tsp vanilla
Put the cocoa, sugar and boiling water into a saucepan. Boil 1 minute, add milk and heat. Do not boil. Add vanilla. Makes 2 cups.
Often there isn't an abundance of milk, and it is convenient to have a mix on hand to whip up a few cups for the kids quickly on a chilly day. For this reason we also make our own hot chocolate mix. The recipe we use is adapted from the one found at the Hillbilly Housewife site.
Hot Chocolate Mix
4 cups of dry milk
1 1/2 cup sugar
1 cup of powdered coffee creamer
3/4 cup of cocoa powder
one package of instant vanilla or chocolate pudding
Put all the ingredients in the food processor and mix until blended. To serve put 1/3 cup of mix into a mug and stir in hot water.
To store our mix we simply use a recycled creamer container. If you have a fun loving husband like mine, perhaps your container can also be labeled using a movie quote.
Either way I make it, we all enjoy warming up with a steaming cup of yummy chocolate! Hope the weather is warmer where you are!
Top Photo Credit: Happy Sleepy