Tuesday, December 30, 2008

Carnival #96 - Pinch Hitting

Greetings! Long story short, I'm jumping in to host the carnival at the last minute before I run out for the store and various other errands.  Apologies for the quickie hosting job.


cooking

ChristineMM presents Triple Chocolate Biscotti Recipe, Ideal for Chocoholics posted at The Thinking Mother, saying, "ChristineMM (The Thinking Mother) shares photos and a link to a recipe for Triple Chocolate Biscotti that she made and that her family loved."


Kristen presents Frugal Antics of a Harried Homemaker: Family Recipes #6 'Rin's Crab Dip posted at Frugal Antics of a Harried Homemaker, saying, "Get ready for New Years with this easy party pleaser!"


Sam presents NEW !! Enjoy Mushrooms. Mushroom Types, Recipes, Magic, Health, Wild posted at Surfer Sam and Friends, saying, "New !! Enjoy Mushrooms Mushroom Types, Recipes, Magic, Health, Wild

Stephanie presents Seafood Stew posted at Adventures in the 100 Acre Wood, saying, "A holiday favorite in this house. This year it will be the New Year's Eve meal." 


Mary@SimplyForties presents Shrimp and Quail Pie posted at SimplyForties.

crafts

hookedoncrochet presents skullholder oh my! posted at Elle's Crochet Corner, saying, "making my own kitchen potholder"

Summer presents Recycle Your Used Wrapping Paper Into Special Thank You Cards posted at Eco Child's Play.


HowToMe presents How To Make an "Angelic" Kitchen Towel Set posted at HowToMe.

other

Abi presents lighter side - Recipe 4 a Happy New Year posted at lighter side, saying, "a different type of Recipe for the New Year"

Raymond presents Work From Home With Paid Online Surveys posted at Money Blue Book.


CindyS presents Make Your Own Dishwasher Soap & More posted at Oh My Aching Debts, saying, "Save money by making your own cleaning products. This recipe is for homemade dishwasher soap as well as other cleaning products."


Ruth presents Camp For Free or Nearly Free! posted at Camping Tips, saying, "Looking to find a campground that is free or $10 or less? There are more places than you'd think where you camp for free or nearly free."

vh presents Volunteer! posted at Funny about Money, saying, "Hi, Dusty-- This isn't exactly a make-it contribution, but I'd like to suggest it anyway, because the Make It from Scratch carnival has a large readership of bloggers who might want to know about this easy way to help make a difference in the world. This is a tool that all of us who make things, do things, and want to help others can use."


Thank you for joining me for this impromptu version of Make it from Scratch! Next week the carnival will be at  The Daily Dish Recipes. Please join us there! 

Saturday, December 27, 2008

New Year's Centerpiece

Here is a quick and easy centerpiece you and the kids can make to ring in the new year. The supplies are so versatile that you probably have them already on hand! These would make a nice little gift for grandparents, aunts and uncles as well.


Materials Needed:
Card stock or craft foam
18 or 20 gauge wire OR pipe cleaners
Styrofoam, or clay
Paper crinkle, Easter grass or shredded paper
Small container
Markers or dimensional paints
Scissors
Decorative wire or floral picks (optional)

Step 1: Trace your kids hands onto card stock or craft foam and cut them out.


Step 2: Using a marker or paints, write your New Year's messages on both sides of the cut-outs. Be sure to include the child's name on the hand print as well.


Step 3: Cut one piece of wire (or use one pipe cleaner) about 12 inches long for each hand print.


Step 4: Cut enough foam (or use clay) to fill the container you are using. Stick one end of the wire or pipe cleaner into the foam or clay. Place some paper crinkle around the base of the wires on top of the foam.


Step 5: Twist a spiral into the top end of the wire or pipe cleaner. Use the spiral to hold the cut out hand prints.


Step 6: adjust wires as necessary and embellish with decorative wire or floral picks if desired.

Other ideas: When you are finished with this centerpiece, you could replace the hand prints with photos. You could also put magnets on the back of the hand prints and use them on your fridge.


Heather is a wife, mom,
school cafeteria worker,
councilwoman and babysitter from Ohio.
She also blogs at
Its All for the Best
and The Fat Bottomed Girl.

Wednesday, December 24, 2008

Merry Christmas


Wishing you a blessed holiday full of peace, joy and love.

Tuesday, December 23, 2008

Carnival #95


The 95th edition of the Make it from Scratch carnival can be found at Adventures in the 100 Acres Wood. Lot of ideas there for last minute holiday baking, wrapping, homemade gifts, and more. Enjoy the carnival this week!

Monday, December 22, 2008

Christmas Spirit Award

Thank you to Omah's Helping Hands for awarding Make it from Scratch the 2008 Christmas Spirit Award.


Part of receiving this award is to list your five favorite things about Christmas.

1) I love reading the Christmas story together as a family Christmas morning.
2) One of my favorite traditions is attending a candle light Christmas Eve service. 
3) The look on the children's faces as they open up their presents, but
4) Even better than that, is watching them as others open the presents that were made or picked by the kids. I think they get more excited about the gifts they give than the ones they receive.
5) Time spent with extended family. 

Another part of receiving this award is passing it along to others. I am only taking a moment this morning to pass this award on to one other blog. It isn't that I think this is the only blog out there worthy of the award, but this is a blog I've been meaning to highlight for some time. This seems like the perfect opportunity to do so. 

This blog recently was started by a mom I know through our homeschool co-op group. It is entirely devoted to Christmas, the true story and the origin behind our traditions. Her latest post 1st Corinthians 13, Christmas Style is particularly poignant for those of who get caught up in the busyness of this season. 

A Merry Christmas to you!

Saturday, December 20, 2008

A Christmas Craft Break

I am taking a Christmas break from posting a craft here. I hope you all have a wonderful and blessed Christmas.

Be sure to visit next Saturday when I'll be back with a cool New Year's Craft!

Thanks for reading!

Heather


Heather is a wife, mom,
school cafeteria worker,
councilwoman and babysitter from Ohio.
She also blogs at
Its All for the Best
and
The Fat Bottomed Girl.

Thursday, December 18, 2008

Edible Gifts: Putting it all together

I've been sharing ideas for edible presents. Edible presents are wonderful for those on your list who are hard to shop for, or seem to have everything. Most people enjoy homemade treats. They are delicious and consumable, so they don't just sit around gathering dust.

We are coming down to the wire for Christmas gifts this year. One week to go. Now that you've invested your time to create these homemade gifts, it is time to put it all together to create a pretty gift. You don't have to be artsy or crafty; believe me I am not, that is Heather's speciality, a few very simple touches can complete the look of your tasty gifts.

Many of the gifts we have talked about will come in a jar, like the pickled jalapenos pictured.  Use canning jars, or check out the selection of different shaped jars at the thrift store, dollar store, or at the craft store. 

There are so many ways to finish a jar. A mason type jar with a lid and ring can be decorated by simply cutting a circle of cloth with pinking shears. Place a the material over the lid and secure with the ring. Some other interesting ideas have been shared recently in the Make it from Scratch carnivals. See how Leigh decorated her lids with glitter, or the way  Happy Campers used scrap book paper to top their lids

You also will probably want to include a tag of some sort. The pickled peppers are self explanatory, so a simple square of card stock stamped with a holiday greeting will suffice. It is tied on with ribbon through a hole punched in the corner. 

If this were a gift mix, like hot chocolate mix, I would label what the mix was and be sure to include instructions. With items that are perhaps a bit unfamiliar to the recipient, like hot pepper jam, I include a list of suggested uses for the item. The tags can be handwritten or printed out and glued to card stock

Labels could also be printed out a stuck right to the jars. This does look really nice, but I never do it this way. The reason I don't is completely a practical one. I like to reuse jars, and getting the stickers off is a pain. See? I am practical to the core. 

Other gifts like cookies or candy can be placed in a tin, plastic container, on a tray, in a plastic bag, or in a basket. The chocolate covered pretzels pictured are in small plastic bags purchased from the craft store. Simply place the items in the bag and tie off with ribbon. These were gifts that my husband gave to his clients. 

If you want to make a larger gift with a variety of treats, place several of these bags into a basket filled with shredded colored paper, and put a big bow on the basket. Cellophane can also be purchased at crafts stores. This can be used to wrap a cookie or bread tray. Again just add ribbon, a bow and a card to complete. 

Your imagination is the limit when putting together your edible gifts. Here I've shown you a few simple and easy things that anyone (including myself!) can do. I'd love to hear your ideas and tips too!

Ideas for edible gifts:

Tuesday, December 16, 2008

Carnival #94

This week you will find the carnival at 11th Heaven's Homemaking Haven. There are some fantastic submissions this week, and our hostess has drawn us in with pictures of these fabulous creations. It is hard to pick only a few to highlight. Be sure to check the complete carnival out!

Crystallized ginger and syrup
I love the taste of ginger. One simple procedure produces two great ginger products. This is something I will be trying!

Beaded Eggs
Wow these are beautiful!

Chocolate Chip Peppermint Biscotti
Biscotti is on my baking list to be gifted with some cocoa and coffee mixes, but I am having a hard time deciding what kind of biscotti to make. This has been added to the realm of possibilities.

Enjoy the carnival! Next week I will be hosting at my family blog, Adventures in the 100 Acre Woods. Hope to see you there!

Sunday, December 14, 2008

Magic Reindeer Food


One of my favorite holiday traditions is one we've been doing ever since Matthew was in Kindergarten. That year, he brought home a bag of oats and glitter from his class Christmas party labeled "Magic Reindeer Food." Each year since, we've made a big batch of it using our own recipe and we pass it out to our friends.


I also hold an annual party for the kids I babysit and their parents. We mix up our batch of Magic Reindeer Food for everyone to take home and Santa visits us while we all snack on chips, dip and desserts.


I know that Stephanie usually passes on the recipes here, but since this is pretty much inedible to everyone but reindeer and elves, I am calling it a quick and easy holiday craft.


MAGIC REINDEER FOOD

old fashioned oats

red and green sprinkles or colored sugar

glitter

anything else you can think of


Mix all ingredients together in whatever quantity you need.


Sprinkle it over your driveway on Christmas eve to attract reindeer pulling sleighs.You can make up a large batch and put about 1/4 cup in Ziploc bags for classroom parties, too. Attach a tag with the following poem on it:

Sprinkle on your lawn at night,

The moon will make it sparkle bright.

As Santa's reindeer fly and roam,

This will guide them to your home.


A HUGE WARNING:Do not leave ANY of the magic reindeer food in your pantry or refrigerator. I did not know this tip the first time we made it and the reindeer came in the house, spilled things from the fridge and pantry and knocked chairs over. Santa left a nice note to apologize, but every year, the reindeer seem to remember that we had it inside one year and they have made a habit of coming in and leaving a mess behind every year since.
Heather is a wife, mom,
school cafeteria worker,
councilwoman and babysitter from Ohio.
She also blogs at Its All for the Best

Thursday, December 11, 2008

Christmas Cookie Favorites

The holidays just don't quite seem complete with out Christmas cookies. During the rest of the year I normally opt for sweets that do not take quite as much time, like bar cookies, brownies or cakes. At Christmas though, I thoroughly enjoy a day (or more) of cookie baking.

Cookies can make great gifts too. A few cookies in a small bag can be a perfect small gift for teachers, co-workers, or others. Included in a larger tray or basket they make a great gift for families or for the hard to shop for loved ones on your list. The tray pictured above is headed to the office with my husband. A few more like it will be made over the next few days or so for various gatherings and dinners we are attending. On that tray you can see mini loaves of Amish Friendship Bread along with some of my favorite cookies. The cookie recipes are below.


Grandma Bryan's Tea Cakes

An easy and delicious sugar cookies recipe.

See Grandma Bryan's Tea Cakes on Key Ingredient.


Mint Chocolate Cookies

A soft minty chocolate cookie.

See Mint Chocolate Cookies on Key Ingredient.


Peanut Butter Blossoms

A Christmas time favorite.

See Peanut Butter Blossoms on Key Ingredient.


Double-Ginger Molasses Crisps

A soft and spicy ginger cookie.

See Double-Ginger Molasses Crisps on Key Ingredient.


After spending a day baking cookies, I want to make sure those cookies stay soft and fresh. Placing a slice of bread or apple in the container helps. I lay wax paper over the top of the container before placing the lid on, and if the cookies will be stacked in a container I always put a piece of wax paper between the layers. All of these will freeze well too, except for the Peanut Butter  Blossoms. The chocolate looks a little funny after it has been frozen.

Do you enjoy baking cookies at Christmas? What are some of your favorites?

Tuesday, December 9, 2008

Carnival #93

Mary at Simply Forties is our hostess for today's carnival. Thanks to her for hosting, and thanks to all of you who participated too. Here are some entries that looked particularly interesting to me this morning. 


My oldest son has been asking me to buy eggnog since it first hit the dairy shelves before Thanksgiving. I've been dragging my feet because of the price. The thought of making it at home with all the raw eggs makes my stomach turn a little. This may be the perfect alternative. 

I'm not sure what it is, but I just love chickpeas. I love them in a salad. I love them made into a hummus. I love them sweet and sour. I'm not sure I've ever met a chickpea I didn't like. This recipe looks like another good one. 

Cheesy! YUM!

Thanks for checking out the carnival this week. 

Monday, December 8, 2008

Help Wanted

I want to extend a thank you to everyone who participates in the carnival, and especially to those of you who host it. Of course, we all greatly appreciate those of you who simply enjoy reading the carnival. Thanks to all of you. But we could use some more help in the hosting department. 


Hosting the carnival takes a little time, but is easy. You get to preview all the fantastic entries. You also get a nice spike in the traffic to your blog while introducing new readers to your space. Check the hosting schedule at the Blog Carnival page for available dates. Click the link for more information on hosting. Please email me to get on the schedule. 

And while I'm asking for help. . .

A huge thank you to Heather who has shared so many wonderful and easy craft ideas with all of us! We would love to have more bloggers participate here. Guest posts are welcome. Simply email an idea or article for consideration. 

If you would like to host a carnival or contribute a guest post, please email me at makeitfromscratch at yahoo.com

Thanks so much to all of you! 

photo credit: e50e

Saturday, December 6, 2008

5 Simple Christmas Crafts for Kids

My kids love to make and give gifts for Christmas. We always try to do something fairly simple since they usually want to make them for family, friends, classmates and teachers. We have been known to make 100 or more of the craft of the year. While you don't have to make that many, you may want to once you see how cute and easy these examples are to make!

My first bit of advice is to choose ONE PROJECT. This will make shopping or searching for supplies much easier. It will also be easier for the kids to complete several once they get the hang of it. You can make a few each night or take a weekend and knock them all out at once (the crafts, not the kids. LOL!).

Dough Ornaments
You can use any kind of dough that dries hard for this craft. Our dough is made out of a mixture of tacky glue and cornstarch. To make: Measure out about 1/4 cup of cornstarch on a disposable plastic plate (it will make a mess at first that is easier to throw away than clean up). Make a well in the center of the cornstarch with your fingers and add about 2 Tablespoons of tacky glue. Knead together until a dough forms.
You will need to work with the dough quickly keeping any extra dough covered with plastic as it dries fast! Only make as much dough as you can work with at one time because it does not store well.
Now you can shape your dough or roll it out and cut it cutting small holes for hangers with a straw if desired. Let air dry face-up on wax paper for 24 to 36 hours (depending on thickness). Paint pieces with craft paint and coat with a clear sealer. Attach ribbons and embellishments with tacky glue.

Paint Brush Santa Ornament
Using a small throw-away brush (sometimes called a chip brush), glue a small ball of dough (see above) on just above the bristles for the nose; paint the handle red, the metal ferrule a flesh tone and the bristles white (I used snow medium to give some texture). Allow to dry completely. Glue on some cotton or poly-fill to make the ball on his hat (at the top of the handle), the base of the hat, and his mustache. Add two googly eyes and a spot of red for his lips. Allow to dry and add a string or ribbon through the hole in the handle for a hanger.

Ribbon-Stitched Foam Stocking
Cut out two pieces of red craft foam in the shape of a stocking. Place the two pieces on top of each other and punch holes with a hole puncher around the sides and bottom. Lace the pieces together with white ribbon. Place a candy cane in the top for an extra treat! These could also be made in the shape of Santa's bag, a boot, a tree or any other holiday shape.

Chenille Stem Candy Canes
These are the easiest of the crafts featured today and can be made by even the youngest crafters! Using one white and one red chenille stem (sometimes called pipe cleaners) for each candy cane, fold each chenille stem in half. Put the two bent pieces together and hold them at one end with one hand while you twist them together with the other hand. Bend the top 1.5 inches over to make the cane shape. No need to add a hanger as the cane hangs right over a tree branch.

Foam Christmas Tree
Cut a triangle out of green craft foam in any size you wish. Using a hole puncher, punch out several different colored dots (this is a great way to use those scraps of foam we keep for no reason). Glue dots to the tree with tacky glue. Cut out a small star for the tree top from yellow or from glitter foam and glue to the top of your tree. Punch a hole in the tree to add a ribbon hanger or attach a magnet to the back as we have done!


There you have 5 simple Christmas crafts for the kids to make. I'm sure you'll get hooked on the fun of making these crafts as well. Don't forget to have the kids add their names and the year whenever possible to make a lasting keepsake!


Heather is a wife, mom,
school cafeteria worker,
councilwoman and babysitter from Ohio.
She also blogs at
Its All for the Best
and
The Fat Bottomed Girl.

Thursday, December 4, 2008

Chocolate Covered Gifts

I trust that you all had a wonderful Thanksgiving, and that if you were hosting the meal that all went smoothly. If it didn't, that is alright. Chalk it up to a memorable holiday and learning experience. This is is the third year we have hosted Thanksgiving. I think this is the first time I can truly say that it all went right (even the gravy!) and I wasn't completely stressed by the time the food hit the table. 


With Thanksgiving past, we are full swing into the Christmas season. It is time to pick back up on the series begun well before Thanksgiving, edible Christmas presents. In case you missed the previous posts, they were This Season's Bounty, Next Season's Gifts, Quick Breads, and For Coffee Lovers. This week I am sharing one of my favorite holiday projects, making chocolate candy. 

Making chocolate covered candy can be extremely simple or a little more involved depending on what you are making. If you are new to this, start simple with items like pretzels, nuts, or coffee beans. First, start with good chocolate. Chocolate chips do not work as well as chocolate specifically for candy making. Coating chocolate is sometimes available in large blocks, but more commonly sold in wafers. You can find it in bulk food stores, craft stores, and party stores. This is one of the few times that I recommend a specific brand. Merckens is the best.
 
Coating chocolate comes in a wide variety of colors and flavors. I mainly stick with dark, milk chocolate and white chocolate. The other varieties are good to add color, but tend to taste waxy. 

It is best to use a double boiler to melt the chocolate. If you use a microwave to melt chocolate be careful. Chocolate burns very easily. Microwave in 30-45 second increments, and stir between each heating. Avoid getting any water in the chocolate. 

Once the chocolate is melted it is time for the fun part, dipping. Do all your dipping first. Dip items like pretzels, animal crackers, marshmallows, peanut butter balls (18 oz peanut butter mixed with 1 pound powdered sugar,) or other favorites. Forks, tongs, and chopsticks make great dipping tools, but you can buy tools specially made for the job. Dip the item into the chocolate, tap off any excess chocolate, and lay the item on wax paper to dry. 

Once the item is dry drizzle melted colored chocolate over it to add decoration. Another favorite here it to dip pretzel rod about 3/4 in chocolate, tap off the excess, allow to cool slightly and the roll in sprinkles before the chocolate is set. 

After you have dipped all you can, there will still be quite a bit of chocolate left. Make clusters with the remaining chocolate. Into your bowl or double boiler put nuts, rice crisps, raisins, or a mixture of items. Stir until everything is coated and drop by the spoonful onto wax paper. 

Chocolate covered candies make a great small gift by themselves. Simply place in a pretty bag and tie a bow on. They are a great addition to goody trays or gift baskets of homemade goods. The possibilities are endless, and delicious. 

For more chocolate covered ideas: Easy Chocolate Christmas Candy

Photo credit: Hilary 74


Tuesday, December 2, 2008

Carnival #92

This week's edition of Make it from Scratch is hosted at I've Got a Little Space to Fill. Mama Bear did a wonderful job, and the pictures she has included are making me want to go do some cooking, even at this early hour of the morning. Thanks Mama Bear!


It is a big carnival this week, full of foods, crafts and gift ideas. I only have a few minutes this morning, so be sure to go check the entire carnival, but here are some posts that caught my eye.


A great variety of ideas and recipes to use for homemade gifts this year. The biscotti recipes are on my to do list!

I make my own powdered laundry soap, but I always love to see the different recipes others use. This is a liquid version of the detergent.

I love feeding the birds and watching them outside my kitchen window. This is a great idea for making your own, pretty bird feed with out spending a fortune. Plus, for those of you who live in warm places,  the recipe will hold up in warmer weather.

Thanks for joining us for this week's carnival. We would love to include your post next week! Simply submit it using the blogcarnival form. If you would like to host an edition, please email me at makeitfromscratch at ymail.com

Enjoy the Carnival!

Saturday, November 29, 2008

No Sew Fleece Pillow

For those who liked the fleece scarves so well, I give you yet another no-sew craft project to make with your fleece. These soft and fuzzy fleece throw pillows would be an excellent gift to have on hand for those unexpected guests, to make for teacher gifts or for the kids to make for family members. Kids would even love these for their rooms!

Before you ask, I did do a little sewing on mine just to attach the felt tree, but it isn't required. You may by all means hot glue or iron on an applique or even leave it bare. Just make sure you attach whatever embellishments you want before you tie the pillow.

MATERIALS NEEDED
Fleece
Scissors
Polyester filling or pillow form
Applique or embellishments (optional)
INSTRUCTIONS
Step 1: Cut 2 pieces of fleece out to the size you desire. Mine was 18 1/2 inches X 15 1/2 inches and I used 3 inch fringe, but you can make yours any size. If you are using a pillow form, cut your fabric about 9 inches longer than your pillow form to give you more fringe to work with to fit your form. For example, if your pillow form is 14 X 14 inches, your fleece should measure 23 X 23 inches.
Step 2: Attach any embellishments you wish to the front panel of your pillow.
Step 3: Place front panel of your pillow directly on top of the back panel lining up your edges.
Step 4: Cut a square from each corner that is equal to the fringe you are tying. For example if you are using 3 inch fringe as I did, cut a 3 X 3 inch square out, if you are using 4 inch fringe, cut a 4 X 4 inch square out.
Step 5: Cut fringe strips around all edges that are about 1 1/2 inch wide. Fringe that is too skinny will break. I suggest making your first but in the center of that side and making equal cuts from there out to the end. My dimensions required 8 strips on each the top and bottom edges and 6 on each of the two sides.
Step 6: Begin by tying the fringe strips from the front panel to the ones that coordinate to them from the back panel. You will want to double knot each one to ensure a secure hold. Tie all of the fringe on three sides leaving one side open for stuffing.
Step 7: Stuff your pillow with the filling or your pillow form. Make sure the corners are filled and straight.
Step 8: Finish tying the last side closed.
Heather is a wife, mom,
school cafeteria worker,
councilwoman and babysitter from Ohio.
She also blogs at Its All for the Best

Wednesday, November 26, 2008

Enjoy your Holiday


Happy Thanksgiving to you. Enjoy your time with family and friends. I'll be back to a regular posting schedule next week!


Image Credit: Vintage Holiday Crafts

Tuesday, November 25, 2008

Carnival #91

This week the Make it from Scratch carnival can be found at Feels Like Home. This week you'll find some helpful and tempting posts for Thursday's celebration. There are also some great gift ideas for Christmas. Be sure to read the whole carnival to find your favorites, but here are a few that I found particularly interesting.

Three Easy and Natural Fall Centerpieces.
I'm often to practical to take the time to make things look pretty, but I do so enjoy the beautiful things that others make. Items that are this easy, and made from things in my yard inspire me.

Upcycled Sweater
I recently tried to use old sweater sleeves to make leggings for my six year old. They look so cute, but I need a better way to keep them up. I thought maybe this post would be about making leggings. It is not, but I love what she did with her old sweater. Go and see.

Vanilla Extract
So simple to make your own, and a great gift idea. Hmm....


Enjoy the carnival this week. Be sure to join us next week! Please email me if you would be interested in hosting the carnival at your blog.

Saturday, November 22, 2008

Make Your Own Christmas Gift Tote

Fabric and homemade gift bags are becoming increasingly popular. Not only are they the greener option by saving wrapping paper and being reusable, but they give that added special touch to any gift.


I received a bag like this last year for Christmas (pictured below with a snowman on it). I turned it inside out, took measurements and made my own pattern from that. It is very different from the Fabric Gift Bag with Ties that I posted about in September, but I think you'll agree that it is just as cute. Its definately just as easy to make!

MATERIALS NEEDED

Felt or other fabric, less than one yard
Sewing machine (or a needle to sew by hand)
Thread to match your fabric
Pins
Marking pencil
Measuring tape
Scissors
Applique, fabric paint or decorations (optional)

INSTRUCTIONS

Step 1: Measure, mark and cut the following pieces from your fabric:
2 peices measuring 8 1/2 by 9 1/4 inches. These will make the front and back of the bag.
2 pieces measuring 12 by 1 1/2 inches. These will make your handles.
1 piece measuring 25 1/2 by 2 3/4 inches. This will make the sides and bottom.

NOTE: If you are adding embellishments that require sewing, you will want to add them to your front and back pieces before you assemble your bag to make it easier.


Step 2: Fold the long sides of the handles over so that the edges overlap. Pin and stitch (be sure to backstitch at the beginning and end) down the entire length of each handle. Set those pieces aside.


Step 3: Pin the side/bottom piece to the front/back piece as pictured at left. Stitch along the egde leaving 1/4 inch seam allowance. **When you come to the corner, sink the needle, lift the presser foot and turn 90 degrees. Fold the side/bottom piece to the side so that the long side lines up with the bottom edge of the front piece. Stitch down that side and repeat from **.

Step 4: Pin the other front/back piece to the side/bottom piece and stitch along the three sides in the same manner as above leaving a 1/4 inch seam allowance. Step 5: Fold the top over about 1/2 to 3/4 inch and pin. Sew around entire top to make a nice finished edge.

Step 6: Pin handles in place and stitch them down by sewing forward over the entire handle, backstitching back over the handle and forward stitching over it again.

Step 7: Turn the bag right-side out. Finished!

At this point, you can decorate your bag with fabric paints or glued-on embellishments.


Heather is a wife, mom,
school cafeteria worker,
councilwoman and babysitter from Ohio.
She also blogs at Its All for the Best
and The Fat Bottomed Girl.

Thursday, November 20, 2008

Kreative Bloggers

Taking a small break today from Thursday cooking posts. Hope all your Thanksgiving preparations are coming along nicely.

A big thank you to Modern Mommyhood. She recently awarded Make it from Scratch with the Kreativ Blogger award.


The rules: I have to share six things I'm thankful for and forward this award to six other Kreative Bloggers.

I am thankful for

  • My faith and the freedom to express it.
  • My husband. -He works hard and is so loving and supporting.
  • The 100 Acre Wood. - I love living here!
  • The relative prosperity we as a country enjoy.
  • My children.
  • Blogging- It may sound silly, but it has been a wonderful hobby.

Now to pass the award on to six others.

One pretty thing- Daily inspiration for a handmade life.
Smidge
Little House in the Suburbs - Simplicity, Creativity, Self Sufficiency, Minivans.
11th Heaven's Homemaking Haven - a hard to say name, for a fun and useful blog
How To Me - Saturday Postings of "How-To's" for you from us.
A Pondering Heart - "But Mary kept all these things and pondered them in her heart." Luke 2:19.


In other MIFS business....
The blogroll needs a little housecleaning. If you still have a button or link that goes to Stop the Ride, please, please grab a new code from the Blogroll page and update your link. I will be going around to check the blogs on the roll, and asking those with old links to update and removing any blogs that do not have a button or blogroll up.

While I'm sprucing up the blogroll, I will be adding members to the "Updated on the Blogroll" section in the side bar. This will show the last ten blogs that have been updated. Eventually I will move the full blogroll list to the blogroll page, and only the new section will be on the home page. This will take me some time, so patience please! :)

To those of you that have been patiently been waiting to be added to the blogroll, my apologies. The blogrolling site is still down, but promises to be back soon. I will add you to the "Updated on the Blogroll" section and get you on the full blogroll ASAP.

Have a great Thursday all! I'm off to make dinner rolls and pie crust.

Monday, November 17, 2008

The Make it from Scratch Carnival #90

Welcome to the 90th edition of the Make it from Scratch Carnival. With colder weather here and holidays coming soon, many of us have tasty dishes and gifts on our mind. If you are looking for ideas, you've come to the right place. 

Tasty Dishes
Mary@SimplyForties presents Another Holiday Side Dish posted at SimplyForties. Doesn't this look marvelous?! 

Bobbie Whitehead presents an alternative to pumpkin pie at the holidays.  Recipe Corner is posted at The Backyard Grower.

Stephanie presents Pulling Off a Thanksgiving Feast with tips and links to recipes to make your Thanksgiving dinner a success. Posted at Make It From Scratch.

Leigh presents Look Mom, I’m Evolving posted at Cheap Healthy Good. A delicious (to her surprise) cooked fruit dessert. 

christinemoers presents Make that food last posted at welcome to my brain . net. This is some advice you may need after Thanksgiving. 

OneKrustyMama presents Chicken Pot Pie posted at One Krusty Mama.


3 moms presents Scrumptious Sunday - Chocolate Syrup posted at Happy to be at Home. Can you go wrong with chocolate?


For the Season Just Around the Corner
HappyCampers presents Easy Christmas Gift Idea posted at The Adventures Of The Williams Family. I love how she decorated her gift jars!

Kate presents Candy-Cane Cookies posted at A Simple Walk.

tips and tricks presents How to Efficiently Do Your Holiday Shopping posted at tips and tricks 4 me.


For the Do-It-Yourself Folks
Cindy presents Yellow Barbie Plarn Dress posted at My Recycled Bags

ChristineMM presents PJs! posted at The Thinking Mother, a learning experience for mother and son.


Thank you to all who participated in this edition of Make it for Scratch. Join us again next week at Feels Like Home.  Posts can be submitted via Blog Carnival. If you would like to host a future edition please email me at makeitfromscratch at yahoo.com


Saturday, November 15, 2008

Make Your Own Chinese Yo-yo!


A fabulously simple craft to make by the dozen for stocking stuffers or party favors, Chinese yo-yos are fun for any age. Customize them to your party theme or holiday easily by using appropriate gift wrap. The kids can help make these as a personal homemade gift for their classmates or friends as well.


This craft would also be a great way to use scraps of wrapping paper. Just attach them in a long strip with some transparent tape and cut the strip to the size indicated below.


Supplies needed:


1- 10 to 12 inch long X 1/4 inch diameter Dowel Rod (you could even make a smaller one with an unsharpened pencil!)
Roll of Gift Wrap


Clear Packing tape


Step 1: Remove gift wrap from roll and cut a strip about 4.5 inches wide by 36 inches long. This can be done by re-rolling the paper, measuring 4.5 inches up the side of the roll and cutting that section off.


Step 2: Put a piece of packing tape on one short end of the wrapping paper strip and attach it near one end of the dowel rod by wrapping the tape around the dowel. (See picture at right.)


Step 3: Roll the dowel rod up in the paper and hold tight with your hand for a few seconds.


To use your yo-yo:
Hold the long end of the dowel rod in your hand and 'fling' the paper end away from you (kind of like you're casting a fishing rod). The paper will slide out in a long whirly tube and spring back to the stick! You can store these with a rubber band around them to help keep them tight.
Heather is a wife, mom,
school cafeteria worker,
councilwoman and babysitter from Ohio.
She also blogs at Its All for the Best
and The Fat Bottomed Girl.


Thursday, November 13, 2008

Pulling Off a Thanksgiving Feast

The last few weeks we've been talking about making the Thanksgiving meal from scratch. When you look at the individual dishes, there is nothing that is all that complicated or that requires special skills. Thanksgiving is easy to prepare, right? The individual dishes really are. The challenge is getting all those easy dishes ready at the same time. Here are some ideas that may help.

1. Don't be a hero.
If you are having friends or family over, let them help you. They can bring a dish, or you can give them a job in the kitchen. If you won't have any help, keep the menu simple.

2. Shop now.
Sit down with your recipes and make a list. If you are frugally minded, watch the grocery store fliers and start gathering the items you need when they are on sale, or if you prefer, go to your favorite store and get everything you need. Either way, you do not want to be in the grocery store the week of Thanksgiving. It is chaos I tell you!

3. Start cooking early.
Many things can be prepared well before Thanksgiving. Cranberry sauce could be made now and stored in the refrigerator. Pie crust can be made now and frozen. The pumpkin pies can be made a few days before Thanksgiving. The rolls could be baked and frozen, or if you want fresh rolls for the big day, freeze the rolls unbaked. The bread cubes for stuffing could be made and stored in an airtight container.

I will probably start cooking next week. I try to get as much cooking done as I can before I start cleaning.

4. Write it on the calendar.
The one thing that can bring disaster to all your plans is having a bird that isn't thawed. Count back on your calendar one day for every six pounds of turkey you have. Then count back one more day for good measure. Then write on your calendar, "Put turkey in the refrigerator." I'm not joking. Do it!

5. Plan your cooking space.
Most of us only have one oven and four burners to work with. You may need to call out the reinforcements. In Talking Turkey I suggested using a roaster oven for the turkey. It could also be used for baked potatoes or stuffing. Crockpots are good for easy sides like vegetables, potatoes, or just to keep items warm.

6. Make a schedule.
Using your menu, make a time line of cooking events. Write down, in order, what time each dish needs to be started and reminders of tasks like pulling the roll dough out of the freezer to thaw or getting the butter out of the refrigerator to soften. You may not be able to stick exactly to the schedule, but having it written down will give you a plan to follow for the day.

7. T'was the night before Thanksgiving.
Use this time to do as much prep work as possible. Chop the vegetables for salad, for the stuffing, and to stuff the bird. Peel potatoes and keep them in a bowl of water overnight. Complete any other dishes that could be made ahead.

8. Relax.
Take a deep breath. Count your blessings, and enjoy your day with family and friends.

*************************************************************************************
Join us Tuesday for a special Thanksgiving edition of the Make it from Scratch carnival. Add your favorite Thanksgiving recipes and ideas using the submission form at Blog Carnival.


More Made from Scratch Thanksgiving posts:
Talking Turkey
Potatoes and Sides
Rolls
Cranberry Sauce
Pumpkin Pie
Stuffing

Wednesday, November 12, 2008

Vote for Make it From Scratch!

Join Us at the HSBA!


Thank you to those who nominated us for the Best Variety category! The voting has begun and will continue until November 21. Would you take a moment to pop over there and vote for us?  Thanks!

Tuesday, November 11, 2008

Carnival # 89

A little late, but well worth the wait, this week's carnival is at The Daily Dish. I feel like I say this every week, but there are so many great submissions this week. Well, even if I do say it every week, it is true! We have a very talented and creative group of bloggers participating in this carnival. Every week I'm impressed and inspired. Thanks to all of you!

A few favorites this week:

Candy Cane Hearts
This is such an adorable craft. The best thing is even a craft challenged mom, like myself, could make these with her kids!

Frugal Gift For Frugal People
Cute, easy and something any frugal shopper would appreciate.

Chainmail Bracelet
WOW! Way beyond me, but WOW!

What no recipes in my favorites?! Unusual I know. There are plenty of good ones over at the carnival. So, go see them and enjoy!

Next week the carnival is right here with an optional Thanksgiving theme. Give me your best Thanksgiving crafts, sewing, cooking, or other projects! Use the blog carnival form to submit your post.

Would you like to host the carnival? We can always use a few more people on the schedule! Just email me!

Saturday, November 8, 2008

Mitten Gift Bag/Decoration


These oh-so-cute mittens are so versatile and easy to whip up, you'll want to make them by the dozen! They can be used for so many things: a mini gift bag for cash or gift cards, a package add-on, a decoration to hang on the wall or on a door knob or a tree ornament. They also fit into the "all winter long" category which means you can leave them hanging for a splash of color after you've taken down all of the Christmas decorations!

These would also be nice to embellish with felt stars, sprigs of faux greenery, jingle bells, bows or smaller snowman ornaments.

Materials needed:
Fabric (I used some from an old flannel shirt and some scrap fleece)
Sewing machine or needle and thread
Craft wire, ribbon or twine
Scissors
Unsharpened pencil or chopstick
Embellishments (optional)


Step 1: Begin by making a pattern or using one like this one I found online.


Step 2: Cut the pattern out and cut two mitten shapes from the fabric. Stitch all the way around the edge with a 1/4 inch seam allowance leaving the bottom open.


Step 3: Clip the seams on the curves and trim the seam allowance to keep the fabric from puckering when turned right-side out.

Step 4: Turn the mitten right-side out using a chopstick or unsharpened pencil to help push the seams out all the way.

Step 5: Cut about 12 inches of craft wire. For a decorative touch, create a coil in the center of the wire by wrapping it around a pencil several times, then stretching the coil out a bit.


Step 6: Poke each end of the wire through one seam at the opening of the mitten. Bend the wire and twist to secure it.


Heather is a wife, mom, school cafeteria worker,
councilwoman and babysitter from Ohio.
She also blogs at
Its All for the Best
and
The Fat Bottomed Girl.


Thursday, November 6, 2008

Make it from Scratch Thanksgiving - Talking Turkey

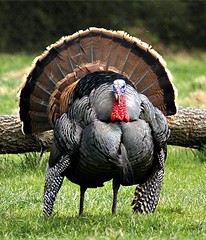
Thanksgiving is a mere three weeks away, and it is time to talk about the star of the show, the turkey. Did I hear squeals of delight? Obviously, you have partaken in Thanksgiving turkey done right, a moist and flavor full bird. 


Or was that groans of dread I heard at the thought of dry meat being choked down with a bunch of gravy? In a quest to make sure the turkey is really done, many cooks roast the bird until it is dry as cardboard. If that has been your experience, let me share some tips for roasting a turkey to perfection. 

What to Buy
Fresh or frozen? Tom or hen? Which brand? It really doesn't matter. Really. That is my experience. And an article in this month's Debt-Proof Living confirms it. The article was written by a former butcher, John Smith, author of Confession of a Butcher.

He  said a frozen turkey is actually fresher than a fresh turkey. He claimed that the quick freezing of the frozen turkey keeps the meat fresher than a "fresh" turkey that is kept almost at the freezing point, but never quite frozen. So, "fresh" is not as fresh as frozen. Frozen is fresher than "fresh." Confused? Just buy the frozen bird. 

Hen or tom? They are labeled by the weight of the bird, not the actual sex of it. Your tom may actually just be a large hen. Or your hen a small tom. The point? Buying a turkey by its sex is pointless. 

Brand? Often they are the same birds in different packaging. Buy what is the cheapest. 

You will want to figure roughly one pound per person when determining the size of bird. Of course if you want a lot of leftovers to freeze and use later, buy a bigger bird. Once you've decided what size bird you need, look for the roundest, plumpest one in that size. 

Bottom Line: Buy the cheapest roundest bird in the size you need.

Now that You Have Your Bird
Keep it cold. It is best defrosted in the refrigerator. It takes about 1 day for each 6 pounds to defrost in the refrigerator. Leave it in the original wrapping, but you will want to place a pan under the bird to catch any dripping. 

Timing is Everything
The biggest stress of pulling off the Thanksgiving dinner is the timing. I will talk more about that with in regards to the whole meal next week, but for today, let's concentrate on timing the bird. Decide when you want to eat and then count backwards to find when the turkey needs to be in the oven. From serving time count back one hour to allow time for carving and to let the turkey rest 20 minutes after it comes out of the oven. Then count back the actual roasting time to find time you need to start the bird. 

Estimated roasting times at 325 degrees F.
6- 8 pounds 3-31/2 hours
8-12 pounds 3 1/2- 4 1/2 hours
12-16 pounds 4 1/2- 5 hours

So, if you want to eat at noon and have a ten pound bird, you need to start roasting the turkey at 7:00 AM. That is figuring one hour for resting and carving and four hours for roasting. 

Preparing Your Turkey
Remove the giblets to use for the dressing. Rinse the bird inside and out. 

Do not stuff with the dressing.  The bread in stuffing absorbs the fat and moisture of the bird, drying out the meat without adding much flavor. Instead, fill the cavity with items that will add moisture and flavor. Onions and celery are my favorites. Apples and carrots are good also. 

Place the turkey in a shallow roasting pan, breast side up. Rub olive oil over the skin and season. Seasoning can be as simple as salt and pepper, or you can use other seasonings you enjoy. I like ginger, garlic, and rosemary.

Loosely cover the turkey with foil.

Your turkey prep will probably take about 30-45 minutes. 

Now You're Cooking
Once the turkey is in the oven, there isn't much else to do with the bird. If you've rubbed oil on it and tented it with foil, there is no need to baste. Just wait until the bird has roasted for about 2/3 of the anticipated time. At this point, you want to start checking the meat so that it does not overcook. Check with a meat thermometer inserted in the thickest part of the drumstick, without touching bone. The turkey is done when it reaches 165 degrees F. The foil needs to be removed for the last half hour of cooking to give the turkey a nice golden color.
 
One more suggestion about roasting the turkey. Oven space is at a premium Thanksgiving day. If you have a large roaster oven, it is a great place for the turkey. One caution though, the bird cooks much faster in the roaster than in the oven. The first year we used a roaster we were shocked when the bird was done almost an hour early. We were able to keep the bird warm and moist while we hurried along the other dishes, but it was a little stressful. 

Practice Makes Perfect
Turkey is cheap this time of year. If you are a little anxious about roasting a moist delicious bird for the big day, why not give it a practice run? There is plenty of time, and you will feel much more confident when the big day comes. 

More Made from Scratch Thanksgiving posts:

Header designed by Crystal. Thanks!