Kellie is a mom, wife, tree-hugger and Martha wanna be. She blogs regularly at Greenhab and the Green Phone Booth.
Call me obsessive (it's certainly been said before) but I keep every scrap of fabric down to the teeeeny tiny little pieces. I can't help myself - what if I need it one day!?
I had a bunch of little pieces left over from Christmas projects. For my mom, I made the softest cashmere scarf (that I was tempted to keep for myself). I got the idea from Betz White's book Sewing Green, in which she made a throw blanket from thrifted cashmere sweaters. You can see the blanket and some of her other projects here. (I have a total crafty crush on Betz because everything she does is simply brilliant and adorable.)
Anyway...back to the scarf! I lined the scarf for my mom with a super soft grey fabric and had just enough left over to make one more scarf for a girlfriend whose birthday is coming up. I chose to dress it up with a few scraps of an Asian print fabric that I love. Instead of giving you detailed instructions I have some cliff's notes since you can really make the scarf as long or as wide as you want it.
Here's what you'll need: some soft cloth for the main part of the cloth, some scraps for the accent pieces, anything else you'd like to use for accents.
The scarf I made is probably about 40 inches long by 7 inches wide. I say "probably" because I cut the grey fabric into two pieces that were 32" long each (one for the front of the scarf, one for the back). I then sliced each piece at random points to insert pieces of the scrap/accent fabric. After reassembling it, I just trimmed the front and back pieces so they were the same length. Because I tend to be all precise like that! ;)
Let's start with the reassembling part! After you sew your scrap pieces in, you'll flip it over and iron the seams inward, pin and sew a line across so that the front is both tidy and sturdy.
Do that at each point where you've added the scrap fabric.
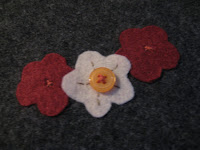
For this project I wanted to add some embellishment at the end of the scarf, so I used felt to make some flowers that look like the flowers in the scrap fabric. I used Heat'n'Bond to affix them to the fabric, then did some hand stitching to give them a little extra security. Looking back I wish I had put more on it, but time didn't really permit.
Now you're ready to assemble the front and back. You'll just lay one on top of the other, right sides together, and sew all sides, leaving a few inches open to turn. Turn it right side out, push out the corners, then top stitch all the way around.
I love the way it turned out - I hope the birthday girl likes it too!


.jpg)


.jpg)


VERY pretty!! I featured your tutorial on Craft Gossip Sewing:
ReplyDeletehttp://sewing.craftgossip.com/tutorial-scrappy-scarf/2010/01/01/
--Anne
Looks amazing.
ReplyDeleteLove this! And using something for myself.
ReplyDeleteI love this! A great idea for fabric scraps...I have linked your turtorial on my FabricateThis.ning.com Network.
ReplyDeleteAww, Man, Kellie--now you're giving me encouragement in saving all those scraps! What's that about?
ReplyDelete:-)
Love this!
--Jenn