While spinach is just about done in the southern part of the country this recipe is so good I wanted to print it anyway!


While spinach is just about done in the southern part of the country this recipe is so good I wanted to print it anyway!

A few weeks ago my kitchen drains seriously started to back up. Slow wasn’t the word for what happened. It seemed overnight, they completely backed up! It was hard to run the dishwasher for the water backing up into the sink. Heck, I couldn’t wash a few potatoes for dinner without water collecting in the sink. It would take over an hour for just a bit of it to drain.
I have no idea what got in there but “it” wasn’t letting hardly any water pass through the pipes. Being the cheap budget savvy person I am, I refused to pay $20 or more for drain cleaner! After a little Googling and some testing in my own kitchen, I discovered some positive results.
Recipe #1
Use a funnel to help sprinkle the borax into one side of the kitchen drain and block the other side with a stopper. Allow the borax to settle in the drain for a few minutes. While you’re waiting, boil at least one cup of water in the microwave or on the stove top. Slowly and carefully pour the water down the drain to activate the borax. Repeat for the other side.
Depending on how backed up your drains are, it may take several treatments. It took me three treatments to fully opened my completely backed up drain.
Recipe #2
Same process as before. Pour one cup of baking soda down one side of the drain. Don’t forget to block the other side with a stopper. Slowly pour the hot vinegar down the drain and allow the baking soda to activate and bubble the clog away. Repeat for the other side.
This worked somewhat well but I think I’ll use it for slow drains instead of completely clogged pipes.
What’s your best recipe for clearing clogs???
 Jenn is a stay at home southern mom raising her kids in Northwestern Minnesota with her trucker hubby. She loves to cook, craft and blog. Soon she’ll be going back to school for a new adventure in Graphic Design. You can find recipes, crafts, parenting strategies, budget tips, product reviews and fabulous giveaways on her blog, Frugal Front Porch.
Welcome to the carnival! The Make it from Scratch carnival is your chance to share your projects. I hope you join us by linking up at the bottom of this post.

 It has been a learning experience. It has at times been quite a challenge, but now that we all seem to have settled into the routine, it is quite rewarding. I am just milking once a day. The babies are left with the does during the day, separated at night, and I milk in the morning. Milking this way, we are getting about 2 quarts of milk everyday. This much milk adds up quick. Now, the fun begins. What to make with all the extra milk?
Still have beets to use? I got this recipe in the weekly email from my CSA yesterday. Give it a try and let me know how it comes out. Even if you don't like beets, you may like this!

4 eggs
1 ½ cups raw sugar or honey
¾ cup coconut oil (can substitute)
2 cups flour
2 teaspoons baking powder
1 ½ teaspoons baking soda
1 teaspoon cinnamon
2 teaspoon vanilla
3 ounces of unsweetened chocolate melted (if you don’t have this use 2T. cocoa and 1T. oil)
3 cups shredded beets
Heat oven to 350 and grease a 13 X9 inch baking pan. Melt chocolate over low heat and while it is melting beat together eggs, sugar and oil. Add chocolate. Sift together flour, baking powder, baking soda, and cinnamon in separate bowl. Add to egg mixture. Add vanilla and beets and stir well. Pour into pan and bake for 40-45 minutes or until a tooth pick comes out clean.

It’s the first “official” day of summer but here it hasn’t been very summer-y! For many of you I’m sure you’ve seen plenty of hot weather but I’m waaay up here in Northwestern Minnesota. We’re the last MN gas station in the US before you hit Canada! Our days have been filled with rain, wind, rain, clouds, rain, a tiny bit of sunshine, rain…well you get the idea. ;D
Needless to say, I’m a little envious of you guys with better weather. I would LOVE to turn on the sprinklers for the kids to run wild or take a nice long bike ride but at least the garden doesn’t need any watering! Too bad it washed away a lot of my seeds. :(
With the kids home for the summer, getting something on the table tasty and fast isn’t always easy. We don’t have pizza delivery or fast food in our small town – not that I’d buy it anyway because it’s just too darn expensive and unhealthy! My kids love mac n cheese and they love pizza! Enter homemade mac n cheese pizza!
Ingredients
Directions
Blend all 2 cups flour, sugar, salt and INSTANT yeast together in a large bowl. Slowly add enough warm water to combine all ingredients. Lightly flour surface and knead in the extra cup of flour until you get a pliable workable dough. (Depending on the moisture in the air and flour you may need less or more flour). Roll with a floured fingers or rolling pin into an 1/4” thick 12 x 9 rectangle or any shape you like. Place dough onto a greased baking sheet. Prick or dock with a fork. Brush the top of the dough with EVOO and sprinkle with herbs like basil, oregano, garlic powder, thyme, etc. Spread prepared macaroni and cheese pizza evenly over pizza crust. Top with shredded cheese and sprinkle with chopped parsley or basil.
Jenn is a stay at home southern mom raising her kids in Northwestern Minnesota with her trucker hubby. Living on one income isn’t easy but it can be done with a little creative thinking and budget savvy strategies. Read more at Frugal Front Porch.
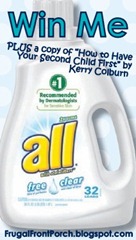
Be sure to check out my latest giveaway! Win 2 free bottles of All Free Clear laundry detergent with a fabulous bonus!

I'm going to be straight up with you. There hasn't been much making-from-scratch the past two weeks. Remember how I had surgery two Fridays ago? That equals a whole lot of sitting around, not being allowed to do much of anything. Well, unless I want to get yelled at by my Mom/husband/mother in law. Who thankfully have been helping us with my son the Bear - he is included in the list of things I'm not allowed to lift.
Not only have I not been doing much, my camera broke this past weekend. I never realized how attached I am to my camera until I couldn't use it. My Mom came to the rescue yesterday though, and has allowed me to borrow her camera until I can either find one on eBay or figure out how to get mine fixed for an affordable cost. This week Ok, last night, I was in a panic. What on earth was I going to post about for my MIFs post?!?!? I haven't done anything MIFs-worthy!! So I am going to share what I baked yesterday: hand pies. They're like sweet little calzones; a tidy handful of pie perfect for school or work lunches, quick snacks and even a dessert if you add a scoop of ice cream (or not!).
My husband goes crazy about these and he doesn't like desserts, as a general rule. Previously I'd only made apple, but have always wanted to try other fillings. They are essentially a pie, so whatever you might find delicious in a two-crust pie would work. Obviously fillings like lemon meringue or key lime wouldn't work well in this application but if you let your imagination run wild with fruit and fruit combinations, chocolate or heck, even a savory route would be totally yum (I'm thinking a beef n cheddar...).
I made three kinds yesterday: strawberry rhubarb, blueberry and apple. Just a few of each - I only made one batch of pâte brisée and out of that one batch made about twenty hand pies. I would have been able to make more but on the first go around I was unable to reroll the scraps...it was my mistake and I'm still kicking myself but anyway! Of course it all depends on the size of whatever you are using to cut out your hand pies. I was using a 3.5 inch Cut n Seal (Pampered Chef) that I found at the thrift store for a dollar.
There really isn't a recipe I can share with you - I was just tossing the fruit with sugar, cornstarch/flour, pinches of salt, gratings of fresh nutmeg and splashes of vanilla. For the strawberry rhubarb I added some strawberry gelatin powder to help the fruit set up nicely and not run as much (although they still ran terribly while baking!). Go with your instincts or loosely follow your favorite fruit pie recipes!
My favorite pâte brisée recipe is from Martha Stewart - it's quite rich with butter but comes out so flaky and tender it's worth the extra calories.
What would you put in a hand pie??
I usually blog at Gotta Little Space and Suitable For Consumption, come say hi!
Welcome to the carnival! The Make it from Scratch carnival is your chance to share your projects. I hope you join us by linking up at the bottom of this post.


Are you looking for ways to use those freshly harvested beets? This salad turned my younger sister from a beet hater to a beet lover!

I started making these as a way to get my kids to eat whole grain waffles without drowning them in syrup or sugar. This sort of defeats the purpose of feeding them whole grain…right???
Turns out, they LOVE them. Especially my almost 4 year old!
They are very simple to make!
Pop your frozen waffle in the toaster till it’s nice n’ toasty warm. Sprinkle some cheese on top with any toppings you like. Pop in the microwave for 30 seconds. Cut with a pizza cutter and enjoy.
My almost 4 year old LOVES blueberry waffles with shredded mozzarella! I know it sounds like a weird combo but at least he’s getting a serving of fruit, grain and dairy all in one meal!
What are some unusually tasty, yet healthy treats your kids love???
Welcome to the carnival! The Make it from Scratch carnival is your chance to share your projects. I hope you join us by linking up at the bottom of this post.


I’ve recently signed up to attend a three-week course on champagnes and other sparkling wines, sponsored by the University of Tennessee’s outreach program. I attended my first class Monday night and, on the assumption that we are interested in drinking as well as eating (!) I thought I’d share a little of what I learned. What follows is a very basic explanation!
Although we tend to refer to most sparkling wines as “champagne”, technically, champagnes are sparkling wines produced in the Champagne area or appellation of France and are primarily made from chardonnay, pinot noir and/or pinot meunier grapes.
Using one of four methods produces the bubbles in sparkling wines. The champagne method involves first fermenting the grapes in a tank and then bottling the result, adding some yeast and sugar and sealing the bottle. The yeast ferments in the bottle, creating the bubbles. After a period of time the bottles are opened, the sediment is removed and the bottles are permanently corked for sale. When you see “champenois” on the label, it means the wine was made using the champagne method. The champenois method is used for making more complex sparkling wines.
Like the champenois, the cuvee or transfer method, involves a second fermentation in the bottle to achieve some complexity, after which the contents are transferred into a tank to clarify and pressurize the wine before it is re-bottled. The charmat or tank method involves second fermentation in a specially pressurized tank, instead of in the bottle. These wines are also bottled under pressure. This is a less expensive process than the champenois method and is common with proseccos and other light sparkling wines. The charmat method produces a smaller, longer lasting bubble than the CO2 method. Using the same method as making soda, some sparkling wines use the CO2 method in which CO2 is injected into the bottle after corking. This method is the least expensive and produces larger bubbles, which dissipate quickly.
Unfortunately, sparkling wine labels don’t always help you figure out what’s going on inside the bottle. On Italian sparkling wines you may see the term “metodo classico”, which refers to the champagne method. While other bottles created using the champagne method may say champenois but some won’t. “Methode Traditionnelle” also refers to the champagne method. I don’t think you’ll ever see CO2 on a label but price will help you there. A $10 bottle of sparkling wine is not one that was created using the champenois method.
From a taste standpoint it’s good to know that Brut means a dry wine with a sugar content of less than 1.5%. Extra Bruts have less than 0.6% sugar. Extra dry is slightly sweeter than a Brut with about 1.2 to 2% sugar. Secs are 1.7 to 3.5% sugar and Demi-Secs are 3.3 – 5% sugar. Celebration wines are also very sweet.
When you see “vintage” on the label that means that all the grapes used in that particular bottle were harvested during the same year. Non-vintage means the wine is made from grapes (or wines) from different years, blended together. You might see the terms “vintage” or “non-vintage” on the label or you might not. If you don’t see a year on the label, you are probably looking at a non-vintage wine. Vintage wines can be cellared longer than non-vintage wines with vintage wines from “good” years being cellared the longest of all. A good, vintage champagne or sparkling wine can be safely cellared for 15 – 20 years.
That’s a lot of information, isn’t it? The only real way to figure out what you like and what you don’t is to drink some sparkling wines! In this week’s class we tried eight different sparkling wines. It was no surprise at all to discover that the dryer, less sweet wines appealed to me the most. Although I consider myself a red wine drinker, I like lighter, brighter sparkling wines. Did you know that there are red sparking wines? I didn’t. I especially liked a Spanish sparkling pinot noir. We also had an excellent sparkling Shiraz from South Australia. Evidently the sparkling Shiraz is as common in Australia as prosecco is in Italy.
Summer and sparkling wines go hand in hand. Go shopping in the sparkling wine section of your local wine shop and host a tasting! See what you and your friends like the most. Here are a few excellent food choices to serve with your sparkling wines:
Cheeses:
Brie goes well with a light and fruity Champagne.
Mild Cheddar goes well with sharp, bright Champagnes.
Chevre pairs with stronger Champagnes.
Colby goes well with medium weight Champagnes.
Pair Edams and Goudas with nutty Champagnes.
Meats
Fois Gras pairs nicely with gentle, delicate Champagnes.
Raw oysters also pair well with delicate Champagnes but avoid lemon and vinegar preparations on the oysters.
Sushi and Champagne go hand-in-hand!
Shellfish like lobsters, shrimp and scallops are also good choices.
Chicken with olive oil but no lemon or vinegar flavors pair well with Champagne.
Desserts
Strawberries are a classic for romantic occasions but use sweet sparklers like Asti Spumanti.
Tarts and crumbles, fruit puddings, shortbread and almond cookies are all good flavors to match with sweeter, dessert champagnes.
Salude!


Summer is officially here in my house! This means long days with my kids plus my husband’s two children at home. Since neither of us are working, the entertainment budget is VERY small, really it’s non-existent but I’ve discovered some fun things they can do throughout the summer to keep them occupied.
One activity uses items right out of the kitchen! Invisible ink!
What kid wouldn’t love writing secret invisible messages revealed only to the person who can uncover the trick to making the message visible again?
Here’s what you’ll need:
Write your messages or draw pictures with a Q-tip dipped in lemon/lime juice. Place your paper with the hidden message on a cookie sheet and into the oven for just a few minutes. Carefully remove the cookie sheet to see the image revealed. Ours took about 2 minutes to fully reveal the invisible message.
If you don’t want to use the oven, you can use a blow dryer but it took us much longer doing it this way and the image was much lighter than when we did it in the oven.
Another option we haven’t tested yet is using grape juice to reveal the hidden message. You swab a Q-tip soaked in grape juice over the dried invisible lemon juice message. The message is revealed when the grape juice interacts with the lemon juice changing the color of the message area. Again, we haven’t tried this one yet but this would be a great activity for later this summer.
What do you have planned for a budget friendly summer?
Jenn’s a southern gal raising her family in Northwestern Minnesota with her husband. Find recipes, crafts, parenting strategies, home keeping tips, product reviews, and giveaways on her blog, Frugal Front Porch. Be sure to link up your giveaways, recipes, or other favorite posts to the weekly blog meme, Strut Your Stuff.
 So I finally caved and made my own laundry detergent and all I have to say is OH MY GOODNESS WHY HAVE I NOT MADE THIS SOONER???
I was so excited to post about my experience but then I realized that I was most likely way behind in this trend and sure enough, Kellie posted about making not only her own laundry detergent but a multitude of other cleaning products (which thankfully, I'm already doing). So I hope that it's alright if I do a repeat...because seriously, I'm pretty excited about this!!
And um, I'm having surgery today. So, yeah. *runs away*
Anyway. Finding a recipe proved to be painless and quite simple. There are of course many variations - liquid or powder, scented or unscented, the different types of washing sodas, bar soaps and other ingredients; I went with something that sounded quite simple:
1 bar soap (I used a simple bar of Ivory but there are many alternatives)
1/2 cup borax
1/2 cup washing soda
Finely grate the bar of soap and stir well to combine with borax and washing soda. Store in an airtight container - use 1 to 2 tablespoons per load. You can also add a few drops of essential oil for a light scent; I used lavender.
See? Totally easy.
My husband was extremely dubious about this whole adventure. He actually got a bit angry and started ranting about how he already has to deal without paper towels and hardly ever any processed foods and the environment this and exposing our skin to chemicals that and gol ding it, he said, I want my clothes to smell all perfumey!
I explained that I had added some essential oil to my mix and that I had only made a small batch - if he didn't like how the clothes/sheets/towels came out using the homemade detergent, we'd go back to using Nellie's and there wouldn't be any harm done.
Turns out, it exceeded my husband's expectations and I am loving it. I love the way the clothes feel and smell! If you haven't tried making your own detergent give it a try!!!
I usually blog at Gotta Little Space and Suitable For Consumption, come say hi!
 Welcome to the carnival! The Make it from Scratch carnival is your chance to share your projects. I hope you join us by linking up at the bottom of this post. Trying the thumbnail version of the linking tool. Love to hear which version you prefer.
The strawberries are almost done. I am not exactly sure if that makes me sad or happy. I don't think we could ever have too many strawberries, but it will be nice to move on to something new. Not to mention, I'm having a little trouble keeping up with all the strawberries.
Which is why my MIFS post this week is about things in process instead of things that are completed. Currently in process in my kitchen is Strawberry Cordial. This is the strawberry version of the Blackberry Cordial that I made last summer. This was so delicious. I can't wait to try the strawberry version.
The next strawberry project on the agenda is something new to me, Strawberry Lemonade concentrate. This project is in process also. Well, in the very early stages of the process. The berries are cleaned and hulled. That counts as starting doesn't it?
I first came across the recipe for this in my Ball Complete Book of Home Preserving. Recession Therapy has a very similar recipe posted at her site.
I am very excited to try this. I imagine myself in the dead of winter mixing up a pitcher of strawberry lemonade, and bringing a little sunshine to the day. Well, I guess that means I need to get moving and bottle up some of that summer goodness.
Photo credit: 101 Recipes
What have you been working on this week?
LINK UP YOUR PROJECTS!
Carnival Guidelines:
Link up your recipes, crafts, garden projects, yarn creations, home improvement, or other d-i-y posts. Posts about making something, or helpful resources and tips for making things are what we are all about.
Please link directly to the post, not to home page of your blog. Kindly link back to the carnival with twitter, stumble and/or from your blog.
This is a great way to use up piles of random greens. The recipe calls for chicory but you can use any cooking greens. I made it the other day using kale, collards, beet greens and baby totsoi. Just make sure they're all well washed and that they equal a pound or two of greens total.


 The great thing about this cookie cutter recipe is you can flavour it quite easily with oil flavoring. I used LorAnn Oils Apple Flavor to both the cookie and the icing, you only need a few drops in the dough and 1 drop in the icing. It goes a long way. You can use the oil in candy and chocolate too.


.jpg)


.jpg)


