Friday, May 29, 2009

Creating a Cookbook for a Wedding Present

Take chances! Make mistakes! Get Messy! 

While Ms. Frizzle was referring to field trip adventures on the Magic School Bus, around here those statements apply to the first of the month. Yes, June will be here on Monday and it is time for Firsts on the First. 

Playing along is easy. Just post about something you've tried to make, from scratch, for the first time (or choose a post from your archives) and add your link to the Mr. Linky at the bottom of the Firsts on the First post on the first of the month, Monday. In honor of the upcoming Firsts on the First, I am reposting the first (and only) time I created a family cookbook for a wedding present.  Creating something like this was taking a big chance, but it turned out well.  A year and a half later, reports are  that the happy couple uses it frequently. 

I don't knit. I don't sew. I don't stamp, scrap or create anything that would be considered art. The extent of my creativity is cooking and gardening. The only reason I tell you this is to emphasize that you do not have to be crafty or particularly creative to make this project.

Awhile ago my family put together a family cookbook for a cousin's wedding gift. The creative part was completed by my brother's wife, Delilah. When I heard that my husband's brother was getting married, I thought someone on his side of the family should put a family cookbook together for this new couple. I tried to get someone else to do the creative part, but there were no takers. It was up to me to put it together.

First I gathered recipes. I got recipes from the groom's and the bride's side of the family. I sorted them by type then typed them up in Word. So far so good, but now the part that pushed my comfort zone; putting it all together.

My super talented sister in law, Delilah, had given the kids their own box of scrap book supplies for Christmas a few years back. There was still quite a bit of card stock left, and by making each section of the cookbook a different color, I did not need to purchase any more.


My mom had purchased a package of different scissors, paper punches and texture makers for the kids to use also. I borrowed them. The only things left to buy were the scrap book itself and a craft glue stick. I spent about $15.

I made a small header for each section. Printed the recipes, cut them out and glued them to the card stock. Then added a bit of decoration, and slipped the whole thing into the protective cover. For one section I just used a fancy font and printed it onto the card stock. That section sure was easy!

In the end there were twenty pages of recipes from various family members. It came together rather nicely. It is simple, and far from perfect, but I am hoping that the sentiment behind it will make up for the cookbook's aesthetic short comings.

I really liked the sections being different colors. I think that will make the cookbook easier to use. In addition to using different colors I also used different design. Remember I am not that creative? It hurt my brain to come up with new ideas for each section. Some of them I was less than thrilled with.

The first design, shown here with the yellow pages, (click on the images for a larger picture) was the one I liked the best. If I do this project again, I will stick with the same design, but in different colors for each section.

I used recipes from family members, but certainly you could use recipes from co-workers, friends or even just your own. Another idea I had, after the fact, was that it would have been nice to include some stories with the recipes. A few words about the recipe, about the bride, the groom or about the person contributing the recipe would add a lot to the cookbook.

Creating a cookbook is a very frugal, yet thoughtful wedding gift. You do not have to be crafty, artistic or talented. If I can do it, so can you.


Thursday, May 28, 2009

When the bee stings

Though the calendar says it is still spring, it feels like summer where I live. Last week I shared with you one of my favorite simple summer pleasures, Peppermint Sun Tea. Unfortunately, summer isn't all about simple pleasures. It does come with a few annoying things too like bee stings. 


Bees and other stinging insects are out in the summer doing their thing.  That is all well and good, until them doing their thing collides with us trying to do ours. The results can be painful. The best way to avoid getting stung is a little prevention. Below are some tips to help avoid colliding paths with a stinging insect. 

1. Don't smell like a flower.
Bees are attracted to strong sweet scents. Avoid using heavy perfumes or perfumed products when you will be in the great outdoors. 

2. Don't look like a flower.
Bees like bright colors. Avoid these and floral prints when you'll be among the stinging insects. 

3. Gentle is the rule. 
Bees will not sting unless they feel threatened. Rapid movement and flailing of arms is threatening to the little insects. Don't swat at them. Hold still until they move on. If one lands on you, blow on it gently to encourage it to go elsewhere. 

4. Don't feed the bees. 
When you are eating outside be sure to keep food covered, especially sweet things like fruit and pop. Yellow jackets are also attracted to meats. 

5. Wear shoes. 
Shoes will protect your feet from stings when a bee is accidentally stepped on. 

6. Plan your gardens carefully.
Bees are good. We want to attract them to our gardens, but plant flowers that attract bees away from areas the kids play and the areas where you relax outside. Not sure which plants bees like? Check this list, Plant List for Attracting Bees

Even if you are careful to avoid stings, you may, as my five year old has already discovered this year, get stung. Don't worry. Unless you are allergic to bees, relief is in your kitchen cupboard. 

First remove the stinger if it is still in the skin.  Then all you need is a little baking soda and water to relieve the pain. Mix them together to form a paste, and apply to the area that was stung. The baking soda will relieve the stinging and help reduce the swelling. 


Enjoy the summer fun outside. Use a little prevention to avoid being stung. If you do get stung,  simply mix up a little baking soda paste for some relief. 

Bee photo credit: yyelsel_ann

Tuesday, May 26, 2009

Carnival #117

This week the carnival is at Ginger Won't Snap. Thanks to Ginger for a fine hosting job. Thanks to all who submitted posts and participated in this week's carnival. 


So many wonderful ideas. There are a couple of yummy looking rhubarb recipes, but alas I will not have rhubarb until next year. Here are some other posts that caught my eye. 

I've been seeing a lot of posts lately about No Knead Bread. This delicious and simple recipe may just get me to try making the dough! 

I need a better way to organize my coupons. This is super frugal way to get it done. 

I've never made Angel Food cake from scratch. It sounds so good. Now I just need some fresh strawberries to go with it! 

Thanks for joining us for the carnival this week. Next week the carnival will be hosted right here at Make it from Scratch. Please submit your posts via Blog Carnival

Here some other carnivals that may be of interest. 


Monday, May 25, 2009

Family Fishing Fun + How to Make a Cane Pole

Happy Memorial Day everyone! I hope yours is turning out to be sunnier than ours. It seems mother nature is determined to alter our holiday plans to take the kids fishing. In the meantime here's a few tips for anyone looking to take even tiniest tots to the fishing banks as well as a very inexpensive make-it-yourself fishing pole that's suitable for the smallest AND largest of hands!

  1. Check with your local DNR to make sure everyone has a fishing license! Some states don't require children to hold a license while others do. It's important to know this or you might find yourself holding a ticket with a large fine!
  2. Make sure you have individually packed snacks and drinks in a cooler. I make half sandwiches, divide up chips, cookies, etc in small ziploc bags to make it easier to give out to the kids. Happy kids = well fed kids!
  3. Don't forget a small trash bag, sunscreen with bug repellent, diapers, and TONS of wipes. It's good to bring baby wipes even if you don't take the kids with you to make the clean up easier!
  4. Most importantly, bring the playpen and a few small toys to entertain your smallest fisherman. Set up your playpen on level ground a safe distance from the water yet close enough to your fishing spot, so you can check on the kiddos.
  5. If possible park your car and set up the play area under a large shade tree. This will help keep the food cooler as well as the kids.
  6. If you enjoy fishing as much as I do then you & your fishing buddy should to take turns checking on the kids. This allows everyone to share the responsibility and enjoyment of fishing with the kiddos.
I love to fish as much, if not more than, my husband but fishing gear can get quite expensive so I prefer to fish with a homemade cane pole. I've had better luck with a cane pole than my husband has with his store bought pole. I've caught catfish, blue gill, crappie, and many other fish off a cane pole. Plus they're easy to make taking only a few minutes and a couple supplies you're likely to have in your tackle box.

Directions to make a cane fishing pole.
  1. Find a long straight stick (NOT a thin switch) at least five feet long that bends slightly when pulled at one end. A dry stick will break when you try to bring a fish in while a stick too long or short provides difficult handling when pulling your fish to the bank. Some folks prefer longer poles but I prefer the handling of one a little shorter than my height. Experience will tell you which length works best for you but starting with something around your overall height is a good starting point.
  2. Cut some fishing line at least one plus a half the length of your pole. If in doubt cut it double the length or longer. Length of the needed fishing line depends on where you're fishing (dock, bank, around logs, etc) but I air on the side of caution by cutting my line longer.
  3. Wrap your fishing line a few inches from end of the stick several times and tie it off pulling hard to make sure the knot is secure.
  4. Tie a hook to the other end of your line, add any weights, bobbers, lures, etc.
  5. Add your bait then toss in your line.
If your line is to long then simply wrap the line around the end of the stick a few times till you acquire the length that's manageable for you. My kids prefer fishing with a cane pole. I use smaller sticks and shorter line for their poles. They don't have to figure out how to time the casting and the line always goes where they want it! When you get a bite, all you do is snatch the pole up and your fish is caught.

When you are done fishing, either wrap the line around the pole securing the hook to the pole or remove the fishing line, toss the stick in the woods or the water, and place the line back in your tackle box for next trip. NEVER toss used fishing line in the water-other fish can get tangled, snag on boater's engine propellers, or further endanger other wildlife.

Here are some great fishing resources to get your fishing trip started!
Tying a Clinch Knot -the knot I use to attach my hook to my line plus they have other great knots you can use too.
Here's a more professional method to creating a cane pole.
Learn about your states fishing license regulations, marina locations, family hot spots, fishing reports, and MUCH more information here.

Friday, May 22, 2009

Create a Garden Journal - Guest Post

Today's guest post comes from Karen at Chicken Sense. Karen blogs about gardening, cooking, sewing, and living in the country. Below she shares some resources to get you started on creating a garden journal. 

A great rainy day project is to begin a garden journal. A garden journal isn’t just a diary, it’s important information to help you get the most from your efforts. You won’t find a better source of growing and gardening tips for next year than the ones you write yourself this year.
journaldailyvisit_2001
Your garden journal can be as simple as a notebook, blank paper, and pencil; or free printable garden journal pages found online; or you can purchase software garden journals; or buy spiral bound garden journal books. Suite 101.com has a nice article about journals: 
Keeping a Garden Journal. Here is another one from Learn2Grow: How to Keep a Garden Journal.

Free Garden Journal Pages to Print

Garden Journal Software and Books to Purchase


Would like to see your post featured here? Please email makeitfromscratch at yahoo.com to submit a guest post.

Thursday, May 21, 2009

Easy Summer Refreshment

This weekend marks the official start of the summer. There are so many wonderful things I look forward to in the summer. I love the picnics, camping, fresh produce from the garden, and the great outdoors, but one of my favorite things in the summer is really very simple, a tall glass of iced peppermint sun tea. 


We are tea drinkers, and pretty much drink iced tea year round. We like tea made about any way, but it is best brewed in a glass jar sitting in the sun. That is hard to accomplish in the freezing temperatures and sporadic glimpses of the sun we get in the winter. In the spring, I can't wait to break out the gallon jar for a pitcher of tea. And as soon as the peppermint is up, that sun tea becomes peppermint sun tea. 

Peppermint Sun Tea
8 tea bags
a handful of peppermint
gallon of water

Put everything in a glass jar, and allow to sit in the sun. The time it takes to brew depends on your taste and the temperature outside, but it should take a least a few hours. I bring it in when it looks right. I remove the tea bags, but often just leave the peppermint in. We drink it unsweetened, but if you are a sweet tea fan dissolve some sugar in hot water to add to the tea. Serve in a nice tall glass over ice. 

Summer is full of wonderful things. The best of those things are the simple pleasures that come in this season. I count peppermint sun tea among those. 

Tuesday, May 19, 2009

Carnival #116

This week's edition of the carnival can be found at It's Frugal Being Green.Thanks to our hostess for a job well done. And thanks to all those who contributed to the carnival this week. Some of my favorites from this week's edition include:

If you don't keep animals, you may not realize how quickly twine accumulates for those of us who do. This is a fantastic idea to use it up. 

My grandma always made her own ketchup. I remember it being too sweet and too thin. Alexandra shares her homemade ketchup experiment with us. 

I love a little history with my recipes. This colonial recipe sounds quite delicious. 

Thanks for joining us for this week's edition. 

Monday, May 18, 2009

5 Minute Mug Brownies Recipe

Now who doesn't totally love brownies! Well if you don't then something MUST be wrong with you!!!! {giggles} With this recipe, you can have brownies anytime you like simply leaving the spoon and mug to clean when you're done!

What can be better than that: Rich yummy chocolate brownies AND very little cleanup!!!!

Ingredients
  • 6 oz coffee cup (microwave proof)
  • 2 tbs self rising flour
  • 1 tbs unsweetened baking cocoa
  • 1 tbs granulated sugar
  • 1 tsp vegetable shortening
  • 3 tbs warm water
Directions
Mix all dry ingredients in mug. Cut in teaspoon of shortening. Mix warm water and let rest for a few seconds and stir again. Microwave 1 minute. Brownies are moist and done. If in doubt check it with a toothpick. Over cooking will create rubbery brownies instead of soft moist brownies.

Jenn's Tips: After practicing this recipe MANY MANY TIMES, I found the combination of warm water then letting the batter rest allowed the flour to thoroughly dissolve into a smoother consistency eliminating the white flour spots shown in the photo above. You can try substituting Vegetable Oil for shortening but, my attempts resulted in a rubbery brownie and the chocolate wasn't as rich.

See more of my recipes, crafts, tips and giveaways at the Frugal Front Porch.

Friday, May 15, 2009

Planter Boxes - Guest Post

Today Chad Chandler shares with us the planter boxes that he built as a finishing touch to his porch remodel. I think the boxes, and the whole porch in fact, turned out beautifully. Chad blogs about the various remodeling projects he has tackled and throws in some cooking posts for good measure. Thanks Chad for this great post. 


We’re finally close to finishing the front porch. After we built a side table and footrest to go with our rocking chair, all we had left to do was build some planter boxes to flank the steps and give us a little privacy. I took care of that this past weekend. This was the original plan:

It’s designed to look like the terracotta pot is suspended by the upper lip, but it’ll really be sitting on cross bars inside the box.

Here is the inner bracing for the two boxes:


Once the pot is filled with soil, it’ll be very heavy. Since the lower braces are going to have to support all of that weight, I added corner supports and a cross bar. When the box is finished, I’ll add perpendicular cross bars for extra support.


Next I added 3/8″ plywood sides to form the boxes and got ready to cut the pieces for the top.

This is a neat little tool. It’s the two points of a compass that can be attached to almost any yardstick for making large arcs and small circles:


I had to guess a little bit on the circumference. I don’t have calipers large enough to measure the pot’s width. I guess I could have measured it with my wife’s measuring tape and worked backwards to get the radius, but I was told there would be no math. Anyway, it worked out fine.

Here are the planter boxes after I’ve caulked the inner joints, filled in the screw holes, and added an accent piece to hide the joints on the top:


I routed a mild curve around the outside edge of the top pieces and added the other cross bars on the inside:


I painted it with several coats of flat, exterior, white paint, and carried the planters and the pots to the front porch. I just set the plants in the pots to see how it all looks. My wife and I will actually plant them sometime this week.


The decorative cut-outs in my original design were supposed to mimic the ornamentation on the porch swing (and the shutters). But after some thought, I decided it was too much. You know, less is more and all that. I wanted the terracotta pots to noticeably juxtapose the white paint, and I think I got the effect I was looking for. The problem is that the steps aren’t centered, and having these boxes on either side puts an exclamation point on that flaw. As someone who’s a stickler for symmetry, this drives me crazy.

Still, the planters are serving their purpose. They act as a natural barrier to give us a little more privacy while keeping the space open:


I know it all looks jammed together in the picture, but the porch is bigger in reality. It’s fun to look at now. Aside from the Adirondack rocker, I made everything on the porch. Even the railing.


Make it from Scratch will be featuring guest post every Friday while Kellie takes a hiatus. Would you like to be featured here? Please email makeitfromscratch at yahoo.com

Thursday, May 14, 2009

Building a Sunflower House

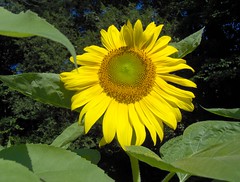
The other day a friend was telling me about an idea for a sunflower house she read in a magazine recently. The article suggested planting sunflowers in a good sized circle leaving a wide gap at one point. After they plants grow fairly tall you pull them together at the top, tepee style, to create a place for the kids to play. 


This reminded me of a project we tried a few years ago. We planted a sunflower house. Our sunflower house worked a bit differently.  We planted sunflowers that had been started indoors in a large square. In between each sunflower we planted pole beans.  Morning glories would also work. 

The way it was supposed to work was that the pole beans would grow up and between the sunflower stalks to create walls. The reality of our project was the deer ate all the plants well before they were forming walls. 

After talking to my friend, I realized that I have extra pole bean and sunflower seeds. I do not have a level spot available where the deer won't be an issue, but I do have a sloping space. It is sounding like a fun project to try with the kids again. 

Have any of you tried growing a sunflower house? How did it turn out? For more information about growing one of these check out the following pages:


Image credit: Homemade Art

Tuesday, May 12, 2009

Carnival #115

This week the Make it from Scratch carnival is hosted by the ever faithful Mama Bear. See the entire carnival at I've Got a Little Space to Fill. There are some great ideas in this week's carnival including lots of gardening tips and some wonderful recipes. Here are a few I found particularly interesting. 


Breakfast is a meal that I sometimes find challenging. I love to cook big breakfasts; on the weekends or for dinner in the evenings. In the morning, I'm just not up to cooking much from scratch or the clean up that goes with it. We don't eat cereal much, and consequently end up eating a lot of toast and oatmeal. This article gave me some ideas of things I can do to add some frugal variety to our breakfasts. 

Making jam in the microwave is a new concept to me. I may be trying it this summer. Sure would help keep the heat out of the kitchen. 

Great tips for enriching soil for those who don't or who are unable to compost. 

Thanks again for joining us this week. If you would like to be added to our hosting schedule please email makeitfromscratch at yahoo.com

Other carnivals of interest:

Monday, May 11, 2009

Cheesy Taco Chili Recipe


When I make chili, I make a HUGE pot of chili. My bunch loves it and we can eat off it for days! You can easily portion this recipe into containers for freezing OR you can reduce it by cutting all the measurements in half. My friend Stacy reminded me this can be converted to a Weight Watcher's friendly dish by reducing the cheese and using ground turkey instead of beef. Here's my not-so-Weight Watcher's friendly version of Cheesy Taco Chili.

Ingredients
1 pound Ground Beef
2 packets of Taco Seasoning Powder
1 large can Dice Tomatoes
3/4 cup Dry Rice
1/8 cup Minced Onion
2 cans Chili/Pinto/Kidney Beans
1/3 cup Heavy Cream
4 oz Pepper Jack Cheese
4 oz Velveeta Cheese
Shredded Cheese (optional topping)

Directions
Boil or brown ground beef till cooked through and drain most of the water. Stir in both taco seasoning powder packets, large can of diced tomatoes PLUS one can of water and minced onion. Allow mixture to come to a boil then add the rice. Once rice is almost done add canned beans and allow chili to come to a slow boil. Stir in cream and cheeses until all the cheese has melted thoroughly. Serve with shredded cheese topping.


This is the steaming pot of chili as it's nearly done! YUMMM!

Saturday, May 9, 2009

Banana Cake

~Heather also blogs at HEATHER LESSITER/It's All for the Best and The Fat Bottomed Girl.~

Banana cake is a favorite in my hubby's family and the recipe is super easy! It isn't exactly "from scratch" since you're kind of doctoring up a cake mix, but it tastes like it's from scratch and that's the key. I hope you'll enjoy it as much as we do.

BANANA CAKE
1 yellow cake mix
1 1/4 cups ripe, mashed bananas (about 3)
1 cup sour* milk
1/4 cup cold coffee
2 eggs

Grease and flour cake pan(s); set aside. preheat oven to 350 (325 for glass pan).

Beat all ingredients together for 2 minutes on high speed. Pour batter into prepared pan(s).

Bake: 9 X 13 pan- 40 to 45 min or 2 8in. or 9in. pans for 32 to 35 min.

Frost with your favorite type of frosting. I use this recipe.

*To sour milk, add 1 Tablespoon vinegar to 1 cup milk and let stand for about 10 minutes.

Friday, May 8, 2009

Rainwater Collection

Kellie is extending her break from MIFS while her newly expanded family settles in. Today I am replaying another post from Stop the Ride, but would like to open up Friday's to you our wonderful readers. Do you have a post that you'd like to share?  Please email me at makeitfromscratch at yahoo.com if you would like to guest post for MIFS.


When you pay for your water, you garden, you are in a drought, and the water company is requesting a large rate increase, a rainwater collection system is suddenly very appealing. 

Our collection system involves collecting the rain water that falls on the roof of our house. It uses the existing gutter and down spouting system. You really can't tell that we are doing anything different by just looking at the house.

The down spouting then runs into PVC pipe and then to the tank. Our pipe is buried, but I have seen systems that simply attached the pipe around the foundation of the house. In my opinion, having PVC wrapped around your house is not all that attractive, but it does save you from digging up your yard. The PVC runs to the tank and fills from the top. The other PVC is the overflow pipe for when the tank is full. We've talked about creating a small duck pond at the end of this pipe.

Our tank is about 2000 gallons. Probably more than we need, but this is a tank that we already had. It is what we used before we had water lines to our house. No, it is not exactly attractive either, but it is out of the main view of the house, tucked in some trees by the rabbit hutches. We don't have neighbors, so who is going to complain? A small building is also planned for the area in front of the hutches. That will help hide the tank even more.

Does it work? I tried to find how much rain we've gotten in the past few days. According to one source, it has been less than 1/4 an inch. It seems to me that we have gotten more than that, but I don't have a rain gauge up. Let's be generous and say we've gotten double that; an 1/2 inch. From those rains we have collected over four hundred gallons of water.


Our system is not yet complete. A small pump still needs to be added. That will enable us to easily get the water up to the garden. Currently the water would have to be hauled by bucket to the garden. We may use the water for more than just the garden too. I'm thinking of it for the animals, the kid's sprinkler, and I'm wondering if I could finagle the hose up to the washer for laundry.

*Update*
We've been using this system for almost two years now. At the end of the overflow pipe we put an old barrel cut in half long ways. It serves as a watering trough for the animals in the pasture. We also attached the pump and are able to water the garden and most of the livestock with this collected water. We do need to add a small amount of bleach to the tank every so often to keep the algae from growing. This system has worked out wonderfully! 

Thursday, May 7, 2009

Stuffed Wild Grape Leaves

The other day I noticed that the leaves on the wild grape vine along our driveway are beginning to open up. Soon it will be time to harvest a bunch of these, and make stuffed grape leaves. 


These are a little time intensive to make, so I recommend making a large batch and freezing the extras for quick and easy dinners later. 

Stuffed Wild Grape Leaves

My version of the Greek favorite.

See Stuffed Wild Grape Leaves on Key Ingredient.

Tuesday, May 5, 2009

Carnival #114

Apologies for the tardiness of the carnival today. The carnival can be found at Lighter Side. There are so many amazing food posts this week. It was worth the wait. 


Some years ago my great aunt, who is in her 90's, found her way to my husbands heart. The way to melt my husband is to make him pecan pie. He has cleaned her gutters for a homemade pecan pie. I've never tried to make one. This recipe looks like a good one to start with. Now what job should I ask him to do as I'm making the pie? 

These sound absolutely fabulous. I've never made my own crackers either. Something else to try! 

I just love Cindy. She has so many wonderful creations, but this is pure genius. Perfect for camping, picnics, and sporting events. 


Thanks for joining us for the carnival this week. Next week the carnival will be hosted at I've Got a Little Space to Fill. Hope to see your post there! 

Would you like to host the carnival? We need host blogs for the end of May and beyond. Please email or leave a comment to sign up to host. 

Monday, May 4, 2009

Homemade Miracle Whip

Find other recipes, crafts, and frugal home making tips at Jenn's Frugal Front Porch.

This is a great recipe I posted on my blog a few weeks ago I felt I HAD to share with all you here.
I love Miracle Whip even though hubby favors plain mayo. When I ran out of Miracle Whip a few weekends ago, I thought I'd try making a home made batch. The only ingredient I needed was dry mustard which is readily available at my local grocer for a semi reasonable price! I read over several recipes I found online and modified this one based on what I learned. It turned out great and tastes JUST LIKE Miracle Whip to me. This is just one more product I'll never buy again!


Ingredients
  • 2 egg yolks
  • 1/2 tsp salt
  • 1 tbs powdered sugar
  • 1 tbs lime or lemon juice
  • 2 tbs vinegar
  • 1 1/2 c vegetable oil
  • 1 1/2 tbs cornstarch
  • 1 tsp dry mustard
  • 1/2 c boiling water
  • 2 tbs vinegar
  • 1/2 tsp paprika
  • 1/2 tsp garlic powder
Directions
  1. Mix the first four ingredients together with a mixer.
  2. Slowly drizzle the oil into the egg mixture making sure to mix thoroughly. Be careful not to add your oil too fast.
  3. Mix in 2 tbs of vinegar and set aside.
  4. In a separate bowl, mix cornstarch, mustard and vinegar together till combined.
  5. Add to cornstarch mixture to boiling water and cook till smooth and pudding like. It should only take a few minutes.
  6. Slowly add the hot cornstarch/mustard mixture to the egg mixture and blend well.
  7. Add paprika and garlic powder. I did this at the end but you should be able to add this anytime.
  8. Refrigerate in airtight container or clean Miracle Whip/Mayo jar.
Makes enough to fill one 11.25 oz jar.


What product would you LOVE to never buy again??????

Saturday, May 2, 2009

Time to Let the Kids Craft!

~Heather also blogs at HEATHER LESSITER/It's All for the Best and The Fat Bottomed Girl.~

Spring gives us lots of opportunities to get those kiddos crafting. Mother's Day and Teacher Appreciation (or end of the school year) gifts are always more special when they're hand-made. Hand-made gifts take a lot of thought and planning and, let's face it, they have a little bit of love built right in. Below are some suggestions for crafts that any mom, grandma, teacher, principal, aunt or whomever will sincerely appreciate.


Homemade Bookmarks, made from ribbon or hand-stamped, are the perfect thing for a teacher or bookworm in the family.


Whip up a few 5 Minute No-Sew Purses for the girlie-girl in your life!


Kellie showed us how to make some fabulous Drink Coasters that I would LOVE to have!


Two years ago, the boys and I made Neck Coolers for Mother's Day and they were a HUGE hit! This is one of my most popular posts and a handmade item I get requests for all the time.
Gifts are extra special when they are made from scratch!!!

Friday, May 1, 2009

Firsts on the First - May

Happy May to you, and welcome to the Firsts on the First. Firsts on the first is my little motivator to try new things, and to make the items that I keep saying, "I'd like to try that someday." I hope you will join in and share something new that you have tried recently. 


I just love this time of year. I love watching the plants grow, and the sudden lush green foliage that is all around. All the change and the beautiful weather is down right inspiring.

With the added motivation of studying about the Czech Republic with the kids we tried several Czech dishes in the last few weeks. They were delicious. Both dishes included making dumplings which I had never made before. We made potato and flour dumplings. Both were very good and delicious. 

The last dish that we tried was Chicken Paprikash. Heather shared this recipe with me, and it was wonderful and economical. I can see this becoming a regular item on the menu. 

Did you try something new this month? Please share with us by putting your link in Mr. Linky below. A link back to Firsts on the First would also be appreciated. 


More Planters from Repuposed Items

Another oldie but goodie from Stop the Ride


The vegetable gardens are full, and now my mind is turning to flowers. I don't plant a lot of flowers, but I do like to have a few planters around. I do have a few store bought containers to plant in, but my favorite planters are ones made from repurposed items. Those of you who've been around awhile may remember the planters I made last year from rotten logs. My mom uses an old fashioned cream separator for a planter. This year I planted herbs in an old wash basin.

You can make planters out of about any item that will hold the dirt. Here are a few tips for making a planter out of repurposed items.

1. Choose a container.
You'll want one proportionate to the plants you want to use. Just be sure to pick something that doesn't have any chemical residues that might kill the plants.

2. Do you need fill?
If the container is large you do not have to fill it all with dirt. Put plastic bottles in the bottom. I used shopping bags in the log planter. It takes up space and creates drainage, not to mention keeps your planter lighter.

3. You do need drainage.
Extra water can't be allowed to puddle in the container. You need a hole or two in the bottom. Put drier lint over the holes to allow water to flow out while keeping the dirt in. A layer of gravel in the bottom of the planter can help with drainage also.

4. Fill with dirt.
Use potting soil or your compost.

5. Put in the flowers.
Be sure to choose plants that will grow well in similar conditions and in the location you intend for the planter.

6. Enjoy.
Don't forget to water.

Planters can be made out of so many things. What catches your eye? Planters out of old wagons, bathtubs, or chipped pottery pieces are interesting.  Just remember there can be a fine line between creative and just junky. Never could figure out why people planted in old toilets!
What are some different items you've seen used for a planter?

Header designed by Crystal. Thanks!