Showing posts with label gifts. Show all posts

Tuesday, June 1, 2010

Thank you cookie for the teacher.... the classic cookie cutter recipe


Hello friends!

Here you are in your summer, where down under we have embarked on our winter - though nothing quite like yours - yet it's cold enough!  Our climate here would be similar to Florida's I think - our winters barely go anywhere near 0 degrees.  Doesn't stop my envy of your summer, but I'm looking forward to the spring.

The year is just rushing past and I'm aware that many of your kids are finishing up school for the year, so I thought I would share with you a cute gift idea whilst also sharing my failsafe cookie cutter recipe.  I've tried many, many others and always return to this one.  It's from Nigella Lawsons' How to Be a Domestic Goddess: Baking and the Art of Comfort Cooking and has many recipes I go back to again and again.

Old River Road Apple Shape Cookie Cutter, CopperThe great thing about this cookie cutter recipe is you can flavour it quite easily with oil flavoring.  I used LorAnn Oils Apple Flavor to both the cookie and the icing, you only need a few drops in the dough and 1 drop in the icing.  It goes a long way.  You can use the oil in candy and chocolate too.

Let your kids do the baking and decorating with you too!


Ingredients: (this will make 20 large apples or 50 small ones)
Cookies
175g unsalted butter
200g caster sugar
2 large eggs
1 tsp vanilla extract
400g strong white flour
1 tsp baking powder
1 tsp salt
2 drops lorann flavour, if desired.

Icing
300g icing sugar, sieved, with coloring and flavour.

Method:
Cream butter and sugar until light and fluffy.  Add eggs, one by one and then the flour, baking powder and salt until it becomes a dough.


Divide in half and wrap each half in clingfilm in a disk.  Refrigerate for 1 hour.


Preheat oven to 180 degrees c
After refrigeration, roll out the dough one disk at a time over a floured surface, dust your cookie cutter in flour and cut out your shapes.
Place on greased tray and bake for about 10-15minutes until golden on top.

Cool on tray and move to a cooling rack. after 10 minutes.  Ice as desired!


You can find more step-by-step cooking from scratch posts and much more at my blog, Frills in the Hills - the fabulous life of our family of five - the fun, the food and the frugality.  Now also tragically on facebook and twitter...


Friday, February 5, 2010

Valentine's Day Redux - Heat Therapy Bag

Kellie is a crafter and tree-hugger who blogs regularly at Greenhab and the Green Phone Booth.

I've been working hard on a cute and functional tutorial for you all but, as things often do in the world of sewing, it just didn't quite work out as perfectly as I'd hoped. Instead of giving you a half-baked project, I decided to work on it for a little bit longer.

So today I'm recycling a project from last year around this time - the Heat Therapy Bag, which is a perfect Valentine's Day gift for teachers and daycare providers. Enjoy! I promise to be back soon with a great new project for you.

Heat Therapy Bags ~ A Valentine's Gift

I tried my hand at making some "heat therapy bags" as stocking stuffers at Christmas. They were very well-received by family (or maybe they're just good fakers) so I decided to make some more - complete with tutorial this time - as Valentine's Day gifts for my son's teachers. I've vowed to have a complete Make If From Scratch Valentine's Day this year with no store-bought ticky-tacky junk...thus the reason I'm getting an early start!

If you're not sure what a heat therapy bag is, it's just a little pouch filled with rice, flax seed, buckwheat, whatever you'd like. You pop it in the microwave for a few minutes and it stays warm for long time. It's a life saver for cramps and muscle aches. And I've been tempted to just curl up with it on a few very cold days this winter. Here's the one I made for Christmas...


First I made the insides. No tutorial here because that part was pretty easy. I used some cheap muslin I had laying around and cut it into a 4" by 16" rectangle. Fold in half and sew up, leaving just enough room to stick a funnel in. That's where you'll pour in the rice. (I've seen people use beans too, but I was a little leery of the smell it might give off when heating it in the microwave.)

Mix up a big bowl of rice with a few drops of an essential oil you like - something relaxing like lavender. Then pour it into the bag using a funnel. Stitch up the opening. Since no one will really see this inside part much, I just sewed it leaving a 1/4 inch seam allowance on the outside and trimmed the edges with pinking shears.

Next you'll cut the fabric for your outer bag. I used a decorator weight for this tutorial, but I've also used upholstery weight and a very thin calico as well. They all seem to work just fine. This is the fabric my mom used to wrap up an antique map she gave my husband for Christmas. I thought that was a totally clever idea and thought it only fitting to repurpose the fabric for this project.

Anyhoo...moving on! Cut your fabric in a 4.5" by 18" rectangle. Fold in half with right sides together and pin the top and bottom.

Sew the top and bottom, then turn out. Voila - you have a bag. Easy-peasy! You may want to press it at this point.
Now you'll sew on the velcro which will be used to close the bag so that the inner rice bag doesn't fall out. You can use the little pre-cut pieces of velcro if you'd like. I happened to have this long strip of black, so I just cut it into pieces. you will sew this about 1/4 inch from the top (open end) of the bag on the outside.
Turn the top inch or so in (oh yes, I'm all about precision aren't I?) like so, and press it.

Pin it, then sew a line all the way around the top of the bag. I sewed mine just below the velcro. It's a little fidgety under the machine and you have to be careful not to sew the two layers together. Er, not that I did that...more than once.

Slide the rice bag in and you're just about done.


The last thing I did was to make a little tag with an explanation and instructions. I'm thinking some people might know what was, but others might just think it's a giant hackey-sack. Plus it's a whole lot cuter with a bow and tag. And I'm all about cute.

It says something like "place in the microwave for 2 - 3 minutes, then use on sore muscles or to relieve tension". I also put a disclaimer saying to spot clean and lay flat to dry. I'm not so confident in my mad sewing skillz yet and don't want anyones gift falling apart in the washer.


There you go - four little teacher gifts made from fabric and supplies already in house.

Friday, January 1, 2010

Scrappy Scarf!

Kellie is a mom, wife, tree-hugger and Martha wanna be. She blogs regularly at Greenhab and the Green Phone Booth.


Call me obsessive (it's certainly been said before) but I keep every scrap of fabric down to the teeeeny tiny little pieces. I can't help myself - what if I need it one day!?

I had a bunch of little pieces left over from Christmas projects. For my mom, I made the softest cashmere scarf (that I was tempted to keep for myself). I got the idea from Betz White's book Sewing Green, in which she made a throw blanket from thrifted cashmere sweaters. You can see the blanket and some of her other projects here. (I have a total crafty crush on Betz because everything she does is simply brilliant and adorable.)

Anyway...back to the scarf! I lined the scarf for my mom with a super soft grey fabric and had just enough left over to make one more scarf for a girlfriend whose birthday is coming up. I chose to dress it up with a few scraps of an Asian print fabric that I love. Instead of giving you detailed instructions I have some cliff's notes since you can really make the scarf as long or as wide as you want it.

Here's what you'll need: some soft cloth for the main part of the cloth, some scraps for the accent pieces, anything else you'd like to use for accents.


The scarf I made is probably about 40 inches long by 7 inches wide. I say "probably" because I cut the grey fabric into two pieces that were 32" long each (one for the front of the scarf, one for the back). I then sliced each piece at random points to insert pieces of the scrap/accent fabric. After reassembling it, I just trimmed the front and back pieces so they were the same length. Because I tend to be all precise like that! ;)

Let's start with the reassembling part! After you sew your scrap pieces in, you'll flip it over and iron the seams inward, pin and sew a line across so that the front is both tidy and sturdy.


Do that at each point where you've added the scrap fabric.

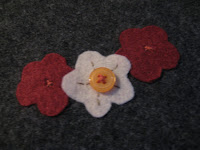
For this project I wanted to add some embellishment at the end of the scarf, so I used felt to make some flowers that look like the flowers in the scrap fabric. I used Heat'n'Bond to affix them to the fabric, then did some hand stitching to give them a little extra security. Looking back I wish I had put more on it, but time didn't really permit.


Now you're ready to assemble the front and back. You'll just lay one on top of the other, right sides together, and sew all sides, leaving a few inches open to turn. Turn it right side out, push out the corners, then top stitch all the way around.


I love the way it turned out - I hope the birthday girl likes it too!

Monday, December 21, 2009

Emergency Gift Ideas

Christmas is almost here! YAY!! Seems like last week was Thanksgiving; I don't know where the time went! The gift list has been made and it's been checked twice. All my shopping is done and the cooking will begin shortly. Gifts get wrapped on Christmas Eve - I've got a 3 year old boy, need I say more? ;D Santa will show up with the rest of the loot sometime during the night! Sounds like I am home stretch, right?

After a visit from some of the hubster's friends yesterday, I discovered I was not as close to the finish line as I thought. After they left gifts for the hubster, the kids, AND me, I was quickly reminded how handy it is to have a few extra emergency gifts for those unexpected or forgotten holiday guests.

Here are my emergency gift ideas! They are quick and easy anyone not on your list would love to receive!
Fancy Peppermint Bark - 10 minutes plus cooling - Melt package of almond bark per package directions. Mix in crushed peppermints. It may turn your bark pink. Pour in a foil or wax paper lined baking pan. Allow to cool. Heat colored candy melts or chocolate in double boiler till melted and smooth. Pour over white almond bark. Sprinkle the top with crushed peppermint. Allow to cool on counter or in refrigerator till set. Break or cut into pieces.

Homemade Caramel Corn - 1 hour 15 minutes start to finish - Preheat oven to 200. Start with 10 cups of POPPED corn and remove all unpopped kernels. Place popcorn on lined large baking sheet or pan and set aside. Over medium heat, combine: 1 cup brown sugar, 1/2 cup butter or margarine, 1/4 cup corn syrup and a dash of salt. Bring to boil and boil for 5 minutes, stirring constantly. Stir in 1/2 tsp baking soda (it will foam a little). Continue stirring till it quits foaming and baking soda is dissolved. Pour the HOT mixture over the popcorn. Carefully toss popcorn in the mixture till it is evenly coated. Bake in 200 degree oven for 1 hour stirring at least once. Remove popcorn and allow to cool. It is better than store bought so I'll make this for us as well as for gifts throughout the next year.

Jar Gifts - Time Varies - There are so many ideas using what is in your kitchen already. Cookies, quick breads, drink, and soup mixes. Bath scrubs and salts. Sauce and seasoning recipes. Here's my favorite jar mix recipe site but you can find hundreds by searching for "jar mix recipes". If you preserved any pie filling or soups, they would make excellent gifts too. Simply add a beautiful ribbon and an instruction tag for a great gift.

Electronic Gift Cards - Instantly - Retailers have made it so simple and FAST to purchase and receive gift cards. You can't go wrong with a gift card to Walmart or Kmart. Grocery gift cards are another idea. Then there are movie rentals like Netflix and Blockbuster. My newest find is just for girls, called Fashion Playtes. The girls create their own custom clothing online and use the gift certificate to have it made and shipped. There's several options for under $25. I just wished they had stuff like this when I was a girl!!!

So there you have it, my list of emergency gifts. What's on your list???

From my porch to yours, I wish you a safe and happy holiday season! See you next week!

Jenn also blogs about crafty and foodie things at Frugal Front Porch!

Sunday, December 13, 2009

Handmade Gifts for the Fellas

A sweet girl named Megan posted a comment asking for some handmade gift ideas for the guys in her life. Here's what she said:

I need some help!
this year I wanted to make christmas presents for everyone in my family. I have great Gifs made/almost made for all of my girl relatives... but when It come to my dad, grandpa, uncle, and 14 year old brother I'm stumped! I try searching google for ideas, but it's not really helping me out, (I'm only 12 and can handle adult craft stuff, but some of the ideas on other sites seem really hard, and expensive to make and will take a long time!). I really need some help because christmas is in 14 days and I want to make something really special for everyone!

Hopefully you can post something to help me out,
~Megan
Megan, this post is for you and anyone else who needs some ideas for the fellas in your life!

My favorite place to look for inspiration is Etsy! They have a gift guide section for the guys that is fantastic. Another place to find inspiration is with the fellas themselves. What do they like? Hobbies? Music preferences? Favorite sports teams? What gadgets do they already have? What type of things would make their life simpler? What do they like to eat? Their favorite places? Then I figure out if I can make something in answer to one of these questions.
And YES, I copy other people's ideas. NO, I don't feel any shame when I do it and neither should you! ;D

  • For the techno-guy with cell phones or hand held video games then, perhaps sewing a protective case using fabric with some of their favorite colors or sports team logos. You can "man up" this case at Sew Mama Sew with leather, denim, suede, etc and use metal snaps or buttons. Stitch in a belt clip on the back to make it functional too.
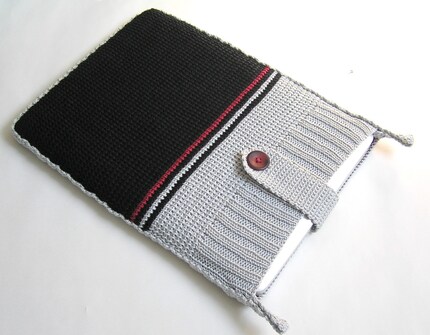
  • Create a laptop case. Here's a link to 12 different free tutorials. Use tweed, wool, or a range of fabrics you can easily find in the men's department at the thrift store. This keeps the cost down and allows you to quickly find material deemed "manly".
  • Consider Kellie's coffee cuff for the coffee drinker in your life. Give it some guy flair with skull and cross bones fabric, denim, camouflage, leather, or other dark colored fabric with metallic buttons.
  • For the businessman in the family, make (or buy) an simple tie and screen print it with a design you create. Here's an easy an inexpensive tutorial for screen printing with Modge Podge. An idea you can really go nuts with!
  • Consider making scarves and hats. I can't knit or crotchet but if you can, this would be great time to bust out those skills. Kellie has a great tutorial on making them from old sweaters. I make mine from two colors of fleece. Cut two long rectangles for the scarf. Stitch the long sides. Pull through to hide the seam. Cut fringe on the ends and tie to each other in a square knot. Fleece doesn't unravel and it's warm! Here's a tutorial from Martha Stewart's site to make the fleece hat.
  • Another great idea is a home baked goodies! I haven't met a man yet who doesn't like a home baked treat! Bake a batch of their favorite cookies, package them in an inexpensive decorative tin from the dollar store. I have a super simple chocolate toffee recipe you should be able to make with no trouble at all. There's also Stephanie's Chocolate Covered Pretzels. PLEASE make sure to get parental permission first.
  • Make a simple clock with an inexpensive clock kit from the craft store and a dry erase board, an LP record, picture frame, or virtually anything else. Search for things at the thrift store to reduce your cost. Leave the glass out of picture frame and seal the background image with a clear top coat or modge podge to make it easier to install the kit. Background ideas: a photo collage, poster, cd cover art, movie and dvd cover art, fabric, a painted design, etc.
  • My husband also suggested a couch caddy! Here's a free pattern I found but it's basically a pouch that fits over the arm of your chair. Perfect for the remote, TV Guide, pens, pencils, and anything else they might need to stash.
  • For the writer, aspiring journalist in the family, a customized covered journal. Again, man it up with images of their favorite sports teams or interests. Use blues, greens, black, silver and camoflauge fabric or paper. Here's a great tutorial on how to do this quickly and easily.
  • I also made a wallet for my step son who FLIPPED over it. Granted, he's 11 but I think this would work for a 14 year old. I used fabric from one of my husband's very worn western shirts and equally worn denim jeans. Added some black felt detail and wha la! It didn't take me long to make and cost nothing. I used denim because it's durable and will last but you can use just about any kind of fabric just make sure you add several layers of interfacing!

Find other great gift ideas in this Father's Day post as well as this article full of sewing tutorials. This is all the ideas I have for the moment. What other ideas do you, the wonderful MIFS readers, have for Megan?

On a slightly unrelated topic, I have a giveaway going on at Frugal Front Porch where 2 winners will receive an eBook bundle from You Can Make This.

*Jenn also writes about craft, recipes, and frugal living at Frugal Front Porch.

Thursday, December 10, 2009

Homemade Chocolate Covered Pretzels

'Tis the season for chocolate!

Well, any season is a good one for chocolate, in my opinion, but the Christmas season is when our kitchen becomes a candy factory for a day or two. One of my favorite chocolate projects is to make chocolate covered pretzels with the kids. They are easy, fun and delicious!

First, you need chocolate. For the best results you will want to start with a good coating chocolate. It is sometime sold in large blocks, but most often you will find it in wafers. It can be found at craft stores, party stores or online. I'm partial to the Merckens Brand.

Coating chocolates come in many colors and flavors. I stick mainly to the dark, light, and white. the kids like the colors. In my opinion, the other colors tend to have a waxy taste. They are great to use to add color to your pretzels though.

Next, you need pretzels. Any pretzel will do, but I like to use the small twists or the large rods. Using holiday shaped pretzels is also a fun idea for this time of year. Lay several sheets of wax paper out to get ready for your chocolate covered pretzel making.

Now, it is time to melt the chocolate. A Double Boiler is the best way to go. You are less likely to burn the chocolate, you can dip right from the double boiler, and you do not have to worry about the chocolate setting up again.

If you don't have a double boiler, chocolate can be melted in the microwave. Put the chocolate in a small bowl and microwave in 30 second increments. Stir after each heating. Do this until the chocolate is completely melted. You may need to reheat periodically during your dipping session.


Let the fun begin. Dip the pretzels in the melted chocolate. For large rods you can simply hold one in end while you dip the other. You may need to use a spoon to help get the chocolate far enough up on the rod.

For twists and other shapes, use a chop stick, fork or tongs to help you with the dipping. Another useful improvised tool is to take a plastic fork and break off the middle tongs, leaving just two tongs on the outside.


After you dip the pretzel in the chocolate, lift it out and gently tap it so any excess chocolate drops off. Lay the pretzel on waxed paper to dry. Before the chocolate is completely set, pretzels can be rolled or sprinkled with colored sugar or other candy sprinkles for decoration. Or wait until the chocolate is a bit more set, and drizzle the pretzels with a different color of melted chocolate. Allow the pretzels to completely dry.


When you've dipped all the pretzels you can, there will still be quite a bit of chocolate in the bottom of your bowl. Don't let it go to waste! Put some peanuts in the chocolate, and stir them around to coat. Drop them by the spoonful onto the waxed paper.

Once dry, if you can keep your family from eating them all, they can simply be stored in a covered container. To give as a gift, simply put them in a plastic bag with some ribbon and a gift tag. They can also be put in a tin or other container. They look great on a tray of other candies or cookies to take to your holiday events. They also are a nice addition to your gift baskets.

Want some more ideas for homemade chocolate candies? Check
Easy Chocolate Christmas Candy.

Making homemade chocolate covered pretzels is an easy and fun project that can be done with the kids. The end result is delicious and pretty. What more could you ask for?

Stephanie is a homeschooling, homesteading momma of four, attempting to live a frugal and simple life in the hills of West Virginia. She also blogs at Stop the Ride and Adventures in the 100 Acre Woods.

Friday, December 4, 2009

Stocking Stuffers for those who are on-the-go...


Kellie is a wife, mom, tree-hugger and crafter extraordinaire. Well, let's not go that far. She blogs regularly at Greenhab and the Green Phone Booth.

I am hip-deep in making Christmas gifts and stocking stuffers this week. Why does December fly by so quickly? (And don't I say that about every month?)

Today I have some cute tutorials for you! At least I think so...hopefully you do to!

In our effort to tread lightly, we also try to influence friends and family in a positive way. This year, I've made a coffee sleeve for my mom's to-go cup, or just to carry in her purse in case she has the sudden need to visit Starbucks.

~*Coffee Sleeve Tutorial*~

You'll need fabric (all the same, or coordinating), some insulated batting, and a paper coffee sleeve from your local coffee shop to use as a pattern. Depending on your preference, you might want a piece of elastic and a button to hold it closed, or even some velcro.


1. Using your coffee sleeve as a pattern, cut your pieces of fabric: one outside, one inside, and one piece of batting. Remember to add about a half inch all the way around for seam allowance.

2. Put the outer and inner fabrics together, right sides together. Then lay the batting on top. I usually cut my batting a little smaller. This makes the whole thing lay flatter once you turn it. As you can see from the third photo, you only need to catch it in a few stitches here and there so it doesn't get loose when you turn it right side out.


3. Sew all the way around, leaving a hole open at the bottom to turn. Clip corners. Notch the top curve and clip the bottom curve so the fabric doesn't bunch up when it's turned.

4. Turn right side out, press, top stitch all the way around.


5. At this point I hand stitched the sleeve closed using a few strands of embroidery thread. I also embellished it with a felt petal and a button.

There are so many ways to close this. You could make it a bit longer, so that the sides overlap, and velcro it closed. Or, sew an elastic loop into one end and a button on the other. I'd like to make one in a solid color and put a little felt bird on it.

~*Utensil Wrap Tutorial*~

For this project I used the same coordinating fabric, a piece of ribbon, and some utensils. (I also made a second version for one of the guys used a more manly mattress ticking fabric and a leather cord instead of ribbon. You can use utensils you already have, of course, but I found these bamboo utensils on sale for a few dollars at Greenfeet and thought they'd be perfect for this gift.


1. Time to cut! The outer and inner fabric will be 12" square. The pocket will be 4" wide by 9" tall. The ribbon can be 24-ish inches long, give or take an inch or two.


2. First we're going to make the inner pocket. Fold the pocket piece in half, with right sides facing. Pin and sew all the way around, leaving an hole at the bottom for turning. Clip the corners, turn and press flat.

3. Pin the pocket to the lining fabric, wherever you desire, and sew the left and right sides of the pocket to the lining fabric, very close to the edge. I used about 1/8 inch allowance there. You can leave the bottom unsewn as it will get eventually be caught when the outer and inner pieces are sewn together.


4. Using a fabric marker, draw two lines from top to bottom of the pocket. (I did mine 1 and 1/8 inches apart, because that was what fit best with my bamboo utensils.) Then sew down each of the lines. Now you've created three little pockets for your fork, knife & spoon.


5. On the left side, pin your ribbon to the lining with the tails going in.

6. Lay your outside fabric on top, so that the right sides are together, pin.

7. Sew most of the way around, leaving an opening of about 4 inches for turning. Use a 1/4 inch seam allowance. Clip corners, turn, press flat.


8. Top stitch using a 1/4 seam allowance.


Now you can fold the top of the napkin down and wrap it up. I like have the top fold down because then the utensils don't fall out the top. I made a crayon roll last year that was very similar to this and I've found that the crayons tend to pop out the top sometimes.

You could make this a totally "green" gift by using an old shirt, handkerchief, or scrap fabric. I throw this in my purse and always have it handy when I'm out and about, which helps me to avoid disposable plasticware.

Header designed by Crystal. Thanks!