Showing posts with label crafts. Show all posts

Monday, August 2, 2010

Quickie Summer Fun Crafts

With the summer coming to an end you might be running low on some boredom busters. We’ve still got another month of summer before we head back to the classroom in September so I’m looking for as many ideas as possible!

The one activity I truly love is J’s summer community program he’s joins through the school. It’s a free and voluntary program managed by a small group of school officials and volunteers. The kids are dropped off at the local school for three hours twice a week to socialize, play, go on field trips, and do other fun things. They supply the kids with a snack while they go over character enhancing lessons like sharing, manners, eating well, etc. J really enjoys the time with his friends without mom hovering and I enjoy the quiet time here after a week of frantic summer activities.

Here’s a couple of projects J’s done this year at his summer community program you might enjoy.

Treasure Hunt (Two versions of this game)

Version 1

Grab an empty bottle, any size will do, and a few odds ‘n ends that will fit into the top opening pretty easily (hook free fishing lures, craft pom poms, sequins, rubber bands, foam pieces, small toys, even coins). Fill you bottle 3/4 of the way with sand, dry beans, Treasure Hunt Bottlesrice, bird seed, anything on hand you have that’s cheap to buy or replace! Add your goodies, cap it and give a good shake. Challenge the kiddos to finding a all the treasure pieces. Make a game of it by seeing who can find them all the quickest.

Version 2

Grab another empty bottle, food coloring, some oil (any cheap clear oil will work), and more water proof goodies. Fill the bottle a little more than half way with water. Add food coloring of your choice and swirl it to evenly mix it. Add your water proof trinkets like plastic toys, sequins, rubber bands, etc. Top off with oil, cap and shake.

Make Your Own Chia PetMake Your Own Chia Pet

Grab a plastic cup, grass seed, potting soil, markers, and an old pair of panty hose. Use the markers to decorate the plastic cup as desired and set aside. Cut the legs off the panty hose about 4” to 6” from the toe. Drop in your grass seed then pack in the potting soil. Tie off the end of the panty hose. Dunk the soil filled panty hose in water until the potting soil is thoroughly moistened. Place some water in the cup and put the panty hose ball (seed side up) on top of the cup and watch the grass grow. As long as the pantyhose  touches the water in the cup, it will draw the liquid into the soil.

What are you guys doing to keep the summer boredom blues at bay?

frugal front porchJenn is a stay at home southern mom raising her kids in Northwestern Minnesota with her trucker hubby. She loves to cook, craft and blog. Soon she’ll be going back to school for a new adventure in Graphic Design. You can find recipes, crafts, parenting strategies, budget tips, product reviews and fabulous giveaways on her blog, Frugal Front Porch.

Friday, July 16, 2010

Friendship Bracelets


So, how's summer going for you? Kids bored yet? Watching a lot of TV and hearing a lot of "There's nothing to doooo!"? I actually don't know what that's like - yet. Thankfully. I'm hoping that I'll be one of those 'cool Moms' that always has a cool game idea or a fun thing to do up my sleeve. Or a craft. Hopefully.

Like friendship bracelets!


Ok I'll admit it. When I saw the picture of these friendship bracelets in the latest Parents magazine, I never intended to post about them. I just remember making them when I was a kid and wanted to make them again. For myself. Oy vey.

You'll want to make them too, whether it's with the kids or without. I made two of them, lickety-split, earlier this week. And then I made four more including an anklet. I'm certifiably insane. My husband is even wearing one - and admitted to me last night that he likes it, and has been asked about it by all of his male coworkers. Because they like it too.

Supplies needed are three different colors of embroidery floss and a bit of tape.

Cut about a two foot long piece of each string and tie them together with a basic knot at one end; leave a bit of a 'tail' so you'll be able to tie the two ends together later. Tape the 'tail' to a surface (table, desk, etc).

Take one of the strings and knot it around the other two. Repeat nine more times and then switch to the second and then third colors, making ten knots with each. You may need to twirl the whole thing occasionally to keep the knots flowing in a tidy curve.

Continue until the bracelet is long enough for the wrist it's going on, knot the end and tie it around the wrist. Trim excess string.

Make sense? I hope so - if not, let me know in the comments and I'll take step by step pictures. It took me a few tries before the bracelet making skills of my youth came back to me, heehee.

Happy summer!!

Monday, June 7, 2010

Cheap Kid’s Summer Activity: Invisible Ink

Summer is officially here in my house! This means long days with my kids plus my husband’s two children at home. Since neither of us are working, the entertainment budget is VERY small, really it’s non-existent but I’ve discovered some fun things they can do throughout the summer to keep them occupied.

One activity uses items right out of the kitchen! Invisible ink!

What kid wouldn’t love writing secret invisible messages revealed only to the person who can uncover the trick to making the message visible again?

Here’s what you’ll need:

  • Paper (duh!)
  • Q-tips
  • lemon or lime juice (fresh or from the plastic lemon shaped bottle)
  • cookie sheet or shallow baking pan
  • dryer or oven set to 400

Write your messages or draw pictures with a Q-tip dipped in lemon/lime juice. Place your paper with the hidden message on a cookie sheet and into the oven for just a few minutes. Carefully remove the cookie sheet to see the image revealed. Ours took about 2 minutes to fully reveal the invisible message.

If you don’t want to use the oven, you can use a blow dryer but it took us much longer doing it this way and the image was much lighter than when we did it in the oven.

Another option we haven’t tested yet is using grape juice to reveal the hidden message. You swab a Q-tip soaked in grape juice over the dried invisible lemon juice message. The message is revealed when the grape juice interacts with the lemon juice changing the color of the message area. Again, we haven’t tried this one yet but this would be a great activity for later this summer.

What do you have planned for a budget friendly summer?


Jenn’s a southern gal raising her family in Northwestern Minnesota with her husband. Find recipes, crafts, parenting strategies, home keeping tips, product reviews, and giveaways on her blog, Frugal Front Porch. Be sure to link up your giveaways, recipes, or other favorite posts to the weekly blog meme, Strut Your Stuff.

Monday, April 12, 2010

My Obsession & Homemade Finger Paint

I have a secret to tell.

I have an insane obsession with old cookbooks. The older the cookbook, the better. I snatch them up at yard sales, thrift stores, book sales; anywhere I can get my grubby little hands on one. 

Photo courtesy of Tour Kittson County

A few weeks ago I discovered a secret treasure in my small sleepy town of 1,000. We have a thrift store. Granted it’s in a small (very small) room located in our Senior Center and it’s supplied mostly from the older people in our community. The seniors turn over what possessions their family’s don’t want and what left after the rummage sales before moving into the nursing home. The thrift store keeps what they believe will sell and donate the remainder to Goodwill.

Needless to say there are tons of antique and classic items in the store. The clothing and shoe fashions aren’t necessarily to my style but they have old records, books, cookbooks, dishes, trinkets, knick knacks, cookware and a myriad of other things I love to look and run my fingers over. Old things not only have a distinctive look, the feel different too. I love to to browse. Taking in all the history. Imagining the treasure's long and colorful journey. Even if I don’t buy anything, the fun is in the looking, touching and day dreaming.

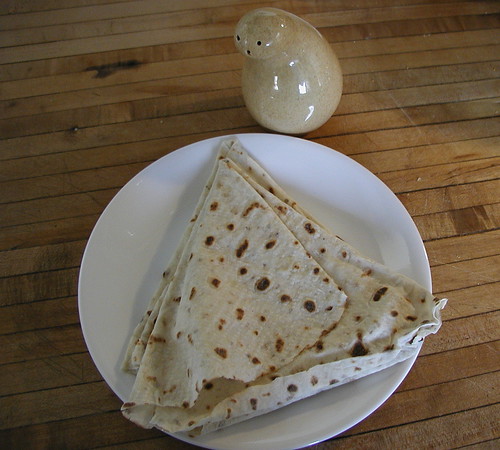
Flikr photo fo Lefse by Litherland

During this visit I discovered a 280 page 1983 church cookbook. It’s full of all sorts of fabulous recipes. There are so many, I haven’t had the chance to give them all a thorough examination. But I will! I live in Scandinavian country so being a native southern gal, I’m not too familiar with dishes like Swedish Rusk, Potato Korv, and Lefse. A sweet toasted cookie, potato sausage, and a potato bread respectively. I’m looking forward to trying some of these dishes. I suspect the ingredients will be easier to locate since this is the type of food folks in this area prepare quite often.

I was quite surprised to discover a “This n That” section of the book listing recipes for play dough, finger Jello, plant fertilizer, finger paint. Today I’ll share the “Rainy Day Finger Paint” courtesy of Becky R. from the Evangelical Mission Covenant Church Centennial Cookbook of 1983.

Flikr Photo by Little Silver

Ingredients
1/2 cup cornstarch
1 envelope Knox gelatin
1/2 cup soap flakes
1 cup cold water
2 cups hot water
food coloring (as desired)

Directions
Combine cornstarch and 3/4 cup cold water. Soak gelatin in remaining 1/4 cup cold water. Stir hot water slowly into starch mixture. Cook and stir over medium heat until mixture boils and is clear. Remove from heat and blend in softened gelatin. Stir in soap flakes until dissolved. Cool mixture. Then divide into a jar for each color. Cover jars to store.


Jenn is a SAHM of two energetic and imaginative boys, one sport lovin' tweenie girl, and wife to a fantastically devoted husband. She writes about family, good food, fun crafts, saving money and her adventures in gardening and sewing at the Frugal Front Porch. Stop by for a visit.

Thursday, April 1, 2010

Easter Egg Revist

Are you decorating eggs this week with the kids? Maybe you are like me an Easter has a little too quickly to plan much. Use what you have on hand to dye your eggs naturally. Below is a revist to a post I shared last year.


One of our favorite Easter traditions is dying eggs. The last few years we have skipped the purchased dye kits, and experimented with making our own dye from items already in our kitchen, like beets, carrots, and onions. 

Natural dyes create softer, more muted tones for your Easter eggs. There are many natural items that you can use to create your own egg dye. Look around the kitchen for items that have strong colors. They will probably make a good dye. 

Here are some ideas to get you started: 
Blue: red cabbage leaves, blueberries
Purple: grape juice, violets
Brown: coffee, tea
Green: spinach
Orange: carrots, paprika, chili powder
Red: cranberries, yellow onion skins, cherries, raspberries, beets
Yellow: turmeric, lemon rinds, cumin, saffron

To make the dye take a good amount of the material you are using, add a couple of teaspoons of vinegar and cover with water. Bring to a boil. The more material you start with and the longer you boil it, the stronger the color. Just remember you want the dye to be several shades darker than the egg color you are hoping for. 

Eggs can be colored by boiling the eggs and dyes separately. This is how I usually dye the eggs.  Strain the dye. Then add the boiled eggs to the hot liquid and allow to soak until the desired color. If you want deeper colors, plan for an over night soak. Put the eggs in the refrigerator if you plan to soak for more than a few hours. This will keep them safe for eating later. If you do not want to eat the dyed eggs, it is not necessary to refrigerate. 
Another option is to make and strain the dye, and then to cook the eggs by boiling them in the dye. Or you can make the eggs and the dye at the same time by boiling the eggs and the dying material together.  For either of these options, the color can be made deeper by keeping the eggs in the dye longer if the color is not quite right by the end of the egg cooking time. Again, you will want to refrigerate if a longer soak is desired. 
The eggs in the photo above were made by boiling the eggs and dye separately. They were soaked overnight in the refrigerator. What made those beautiful colors? The eggs on the top left were dyed in the coffee left over from my morning pot. The three on the right in the top row were dyed in a very weak carrot dye made from the peels and ends of carrots I used for dinner. The three orange/red ones in the middle row were dyed in dye made from the skins of yellow onions (also scraps from our dinner.) The pink eggs soaked in pickled beet juice.  And the beautiful blue and brown speckled eggs on the bottom were created using a secret only known to my hens. Those truly are naturally dyed eggs. 
Creating your own dyes for Easter eggs can be fun and educational. Experiment with different items you have on hand to create a wide range of beautiful colors. You may find some surprises when items you expected to be one color actually create a dye of another color. Enjoy the process.

________________________________________________________________________________

And while I'm sharing Easter Egg posts from the past, I wanted to point you again to Heather's Beaded Eggs. Aren't they pretty!

Happy Easter everyone!

Monday, March 22, 2010

Make a Custom Chalkboard From Tile

Finished Chalkboard Tile Last Friday I had the privilege of teaching a small class of elementary students how to create easy tile coasters. While I was excited to do this, I wanted to show the kids other fun things they could do with everyday things lying around their home. One of the things I showed them was a homemade chalkboard using peel n stick tiles. The process is super simple.

Here’s what you need:

  • chalkboard paint
  • peel n stick tiles
  • newspaper
  • paint brush
  • fine grit sandpaper
  • cardstock, ribbon, or other embellishments

Cover your work area with several layers of newspaper. Grab a peel n stick tile. They are usually pretty big (around 12” x 12”) and I had some left over from a bathroom flooring project.
Sand the top of the tile with a fine grit sand paper. Wipe clean with a damp cloth and allow to thoroughly dry. This will give the paint a surface to adhere to.

Pull off the back paper exposing the sticky side of the tile. Using newspaper (the comics are a good page to use here), cardstock, foam, fabric or other medium to cover the back. Be careful when covering this side of the tile. Once the paper, foam, or fabric is stuck…it is stuck! Trim off the excess and sand the edges.
Flip the tile over and place on top of a block, book or something else to slightly elevate it off your work surface.

Paint several layers of chalkboard paint according to the manufacturers directions. Allow to completely dry.
Personalize the chalkboard with a bit of Modge Podge, some cutout letters (I used my Cricut), colored paint, stickers, buttons and anything else to add a personal touch.

Peel n Stick Tile Tile read to paintCaution: Wet Paint Lined up ready for personlization

Finish the project in a number of ways.
  • Drill a hole at the top near each corner, thread either rope or ribbon through and knot to form a hanger.
  • Use hot glue or Gorilla glue to adhere a strong magnet to the back to hand in a locker.
  • Leave as is or hot glue some fabric trim around the edges for a trendy carry around version.
Finished Chalkboard Tiles

Thursday, January 28, 2010

10 Kid Made Valentine Ideas

I am not exactly sure where January went, but I do know that it is almost gone. Soon I will turn around and it will be Valentines Day, and the kids will need Valentines to share with their friends.

They always enjoy creating the Valentines that will be given. It doesn't have to be anything complicated. A couple years back, we simply cut out hearts from construction paper and used doilies to decorate them. Then the kids wrote a message on the back. Simple and fun.

I'm not sure what we will be doing this year. While I am gathering ideas, I thought I'd share a few of them with you.


Patchwork Heart (There are several ideas on this site. Scroll down for this one.)


Will you be making Valentines this year? Please share your ideas.

Thursday, January 14, 2010

Build a Snowman Kit

My husband's grandmother is a very talented woman. She blesses her family with the many beautiful creations that she makes. She made my wedding dress. She crochets blankets for newly married couples and newborn babies. And most every Christmas a homemade cutie is included among our presents.

Over the years she has made and given us quite the collection of winter decorations. There have been a reindeer, dogs, frogs, santas, gingerbread people, and a wide variety of snow people, some of which are pictured above. This year she gave the kids a little something different; a build a snowman kit.

The snowman kit includes everything you need to build a snowman, except for the snow. There is a hat, eyes, nose, mouth, buttons, scarf, a corn cob pipe, and even arms with mittens.

The hat and mittens are sewn out of vinyl. The mittens are stuffed with pillow stuffing and attached to sticks (arms.) The hat has a V of hanger wire attached at the back. This is for keeping the hat attached to the snowman.


The buttons, eyes, and nose were made by gluing different sized wooden balls unto dowel rods, and then painting. The pipe is a bit of corncob glued to a dowel rod.


A fleece scarf was provided as were flat stones to make the mouth with. And here is the completed snowman. Apologies for the very poor picture quality. I only had my phone with me at the time. Can you tell my phone is practically an antique?


The kids had a lot of fun building their snowman, and dressing him. We are so blessed to have such an incredibly crafty grandma in the family who loves to share her creative talents with us!

Friday, December 18, 2009

Projects on Deck...

Kellie is a tree-hugging mom, wife and crafter with too much to do and too little time. She blogs regularly at Greenhab and the Green Phone Booth.

Since I've had zero time to do many crafty things this week, I thought I would share some of the things on my to-do list instead.

I could use about a hundred of these scrap buckets from Sew I Do in my sewing room. I can just picture them all lined up on a shelf and making me instantly organized.

This blogger is adorable and makes such cute and fashionable clothing and accessories, as well as dolls, wallets and more. You'll get lost in her blog, so be sure to visit it AFTER you read the rest of this post. :@)

(Photo courtesy of Sew I Do.)


Today I made chocolate covered banana pops for my son's preschool holiday program. (You can find the directions here.) Over the weekend I'll be making some Peppermint Bark, which I hear is just as easy. I've been craving it for weeks. Hopefully I can practice some restraint and actually save some to give to Fletcher's teachers on Monday.


I absolutely, positively must find time to make one of these water bottle carriers (a masculine version though) for my mom's beau for Christmas. We gave him a reusable canteen for his birthday and thought he could use a carrier for it since he likes to take a walk each day.

The tutorial (and photo) is from Pink Chalk Studio. I can't wait to make one of these for myself as well...when Christmas is over, that is.


I was also hoping to find time to make a few of these cute little flower pins to use as stocking stuffers. I have so many cute fabric scraps I could use up on these. The tutorial is over on Design*Sponge.

And that's it for my "Things I really need to get done before Christmas" list. My "Things I'd love to find the time to do" list is much longer. If I could only remember to buy a lottery ticket...

Sunday, December 13, 2009

Handmade Gifts for the Fellas

A sweet girl named Megan posted a comment asking for some handmade gift ideas for the guys in her life. Here's what she said:

I need some help!
this year I wanted to make christmas presents for everyone in my family. I have great Gifs made/almost made for all of my girl relatives... but when It come to my dad, grandpa, uncle, and 14 year old brother I'm stumped! I try searching google for ideas, but it's not really helping me out, (I'm only 12 and can handle adult craft stuff, but some of the ideas on other sites seem really hard, and expensive to make and will take a long time!). I really need some help because christmas is in 14 days and I want to make something really special for everyone!

Hopefully you can post something to help me out,
~Megan
Megan, this post is for you and anyone else who needs some ideas for the fellas in your life!

My favorite place to look for inspiration is Etsy! They have a gift guide section for the guys that is fantastic. Another place to find inspiration is with the fellas themselves. What do they like? Hobbies? Music preferences? Favorite sports teams? What gadgets do they already have? What type of things would make their life simpler? What do they like to eat? Their favorite places? Then I figure out if I can make something in answer to one of these questions.
And YES, I copy other people's ideas. NO, I don't feel any shame when I do it and neither should you! ;D

  • For the techno-guy with cell phones or hand held video games then, perhaps sewing a protective case using fabric with some of their favorite colors or sports team logos. You can "man up" this case at Sew Mama Sew with leather, denim, suede, etc and use metal snaps or buttons. Stitch in a belt clip on the back to make it functional too.
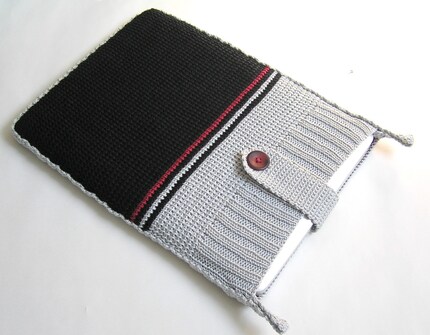
  • Create a laptop case. Here's a link to 12 different free tutorials. Use tweed, wool, or a range of fabrics you can easily find in the men's department at the thrift store. This keeps the cost down and allows you to quickly find material deemed "manly".
  • Consider Kellie's coffee cuff for the coffee drinker in your life. Give it some guy flair with skull and cross bones fabric, denim, camouflage, leather, or other dark colored fabric with metallic buttons.
  • For the businessman in the family, make (or buy) an simple tie and screen print it with a design you create. Here's an easy an inexpensive tutorial for screen printing with Modge Podge. An idea you can really go nuts with!
  • Consider making scarves and hats. I can't knit or crotchet but if you can, this would be great time to bust out those skills. Kellie has a great tutorial on making them from old sweaters. I make mine from two colors of fleece. Cut two long rectangles for the scarf. Stitch the long sides. Pull through to hide the seam. Cut fringe on the ends and tie to each other in a square knot. Fleece doesn't unravel and it's warm! Here's a tutorial from Martha Stewart's site to make the fleece hat.
  • Another great idea is a home baked goodies! I haven't met a man yet who doesn't like a home baked treat! Bake a batch of their favorite cookies, package them in an inexpensive decorative tin from the dollar store. I have a super simple chocolate toffee recipe you should be able to make with no trouble at all. There's also Stephanie's Chocolate Covered Pretzels. PLEASE make sure to get parental permission first.
  • Make a simple clock with an inexpensive clock kit from the craft store and a dry erase board, an LP record, picture frame, or virtually anything else. Search for things at the thrift store to reduce your cost. Leave the glass out of picture frame and seal the background image with a clear top coat or modge podge to make it easier to install the kit. Background ideas: a photo collage, poster, cd cover art, movie and dvd cover art, fabric, a painted design, etc.
  • My husband also suggested a couch caddy! Here's a free pattern I found but it's basically a pouch that fits over the arm of your chair. Perfect for the remote, TV Guide, pens, pencils, and anything else they might need to stash.
  • For the writer, aspiring journalist in the family, a customized covered journal. Again, man it up with images of their favorite sports teams or interests. Use blues, greens, black, silver and camoflauge fabric or paper. Here's a great tutorial on how to do this quickly and easily.
  • I also made a wallet for my step son who FLIPPED over it. Granted, he's 11 but I think this would work for a 14 year old. I used fabric from one of my husband's very worn western shirts and equally worn denim jeans. Added some black felt detail and wha la! It didn't take me long to make and cost nothing. I used denim because it's durable and will last but you can use just about any kind of fabric just make sure you add several layers of interfacing!

Find other great gift ideas in this Father's Day post as well as this article full of sewing tutorials. This is all the ideas I have for the moment. What other ideas do you, the wonderful MIFS readers, have for Megan?

On a slightly unrelated topic, I have a giveaway going on at Frugal Front Porch where 2 winners will receive an eBook bundle from You Can Make This.

*Jenn also writes about craft, recipes, and frugal living at Frugal Front Porch.

Monday, December 7, 2009

How To Make Fabric Gift Tags/Keepsake Ornaments


Here is an easy way to snazz up the perfect gift in no time flat. All you need is some fabric scraps, ribbon scraps, optional felt, coordinating fabric, jingle bells or other embellishments plus pinking shears, needle and thread. You can hand or machine sew.

  1. Cut strips of fabric (or use ribbon) and sew right sides together to make a fabric panel. Make a panel as large as you like.
  2. Create your tag and transfer the image to your fabric. I used chalk since it's easily removed and went with a simple circle but a star, tree, or various other shapes work well. A cookie cutter functions as a wonderful template if you are not the artistic type!
  3. With your pinking shears, cut your template shape plus about 6" to 8" of ribbon for your loop. One on the scrap panel, one felt (optional but gives is a plush look), and the last should be a coordinating fabric for the back.
  4. Piece the layers together with right sides facing out, felt sandwiched in the middle and sew with your preferred stitch with about 1/4" to 1/2" seam.
  5. Finally, add any embellishments you like to personalize your gift tag. Printable fabric opens up the option of adding photos, you can stitch the recipients name, fabric paint and marker allow other decorating options too. If you have an embroidery machine then there is no limit to what creative designs you can create.
I am having trouble deciding on whether I should hand stitch my recipient's name or add some groovy design via iron on fabric! What do you think????


Jenn also writes about crafts, recipes and other house hold tips all on a budget at Frugal Front Porch. If you leave a comment on any MIFS post, it earns you an entry in my Jiffy Lube gift card giveaway. Just head on over to the giveaway post and let me know what post you commented on.

Thursday, December 3, 2009

Making Ornaments with the Kids

Yesterday, was our annual trek for the perfect Christmas tree. Every year we head to the nearest tree farm, and hike through their fields until the perfect tree has been located. It is always a fun family day. Yesterday was no exception, despite the cool wet weather, but the best part comes after we get the tree home.

With our oldest child's first Christmas a tradition began. A new ornament was added to the tree for that child each year. Of course, many years there are several ornaments because other family members give ornaments as gifts, and ornaments are made with various groups we participate in. Now, three more kids and eleven years later, our tree is full of ornaments for the kids. Bringing out those ornaments each year brings lots of memories, discussions, and warm hearts.

Many of the ornaments are purchased, and they are beautiful, but my favorites are the hand made ones. They are not always the most beautiful ornaments on the tree, but they do have the most beautiful memories associated with them. These usually are the ornaments the kids remember best, and the ones that I cherish most.

Here are a few of the homemade ornaments on our tree this year. Some are old. Some are new. Some we made as a family, and some the kids made elsewhere. All of them hold a special place in our hearts.

Easy Photo Ornaments.
These are so incredibly simple. Fold a piece of construction paper or card stock in half. Cut out a ball ornament, keeping the fold in tact at the little rectangle on top or the ornament. Decorate the outside front with glitter, coloring or other decorations. Cut a photo of the child in the same shape as the ornament and glue it inside. Use a ribbon to hang the ornament.


Recycled Christmas Card Ornament
This is a wonderful way to use last year's Christmas cards, and create and easy ornament with the kids. Simply cut out the main image from a Christmas card. Glue ribbon or other embellishments around the edges. Punch a hole in the top corner, and use ribbon to create a hanger for the ornament.


Painted Glass Bulbs
Buy clear or colored glass bulbs. Paint with glass paint, or use glue and glitter to decorate the bulbs. Confetti, glitter or other items can also be put into the inside of the bulb for a decorative effect.

Dough Ornaments
See Heather's instructions for making the dough in 5 Simple Christmas Crafts for Kids. My favorite dough ornaments were made long ago when my eleven year old's hand fit into that mold. *sigh* We made a foot print ornament for his then baby sister.


Beaded Candy Canes
Simply take a piece of pipe cleaner. Thread red and white beads onto it and fold the pipe cleaner around each end. Bend into a cane shape.


Pottery Ornaments
Though a little more expensive, it is a fun family time to take the kids to a make and take pottery place. Our local one is called the Pottery Place. Simply go and pick out a ready made pottery ornament. Then paint it how you like. They fire it, and you can pick up when it is done.


Our tree is full of children's ornaments. Some are purchased, and some are homemade. Every year a new one (or two or three) is added for each child. Every year we label the new ornaments with the child's initials, and the year. Pulling them out each year to decorate the tree is one of my favorite family times. They are all special, but the homemade ones are the best!

Header designed by Crystal. Thanks!